


Many individuals begin a blog with a complimentary address from the platform, like myblog.blogspot. However, as the blog grows, it’s typical to switch to a custom domain, like myblog.com.br, on Blogger.
Having a custom domain for your blog enhances its professional appearance and offers various benefits, including the ability to use a professional email address (e.g. name@myblog.com), improved search engine rankings, increased credibility, and more.
If you have logged in to any company and wish to establish a custom domain on Blogger, you can easily complete this process by following the steps provided.
Prerequisites (for the intended audience of this tutorial)
This guide is for individuals with a blog on Blogger who have a domain registered elsewhere and wish to configure it on the platform. Instructions will be provided on how to establish a custom domain on Blogger using a domain registered with any domain/hosting company.
If you haven’t purchased your own blog domain yet, here are the top domain registration companies in Brazil and globally.
Check our list of the top domain extensions for Blogs if you’re unsure which domain to register.
Setting up a custom domain on Blogger – a detailed guide
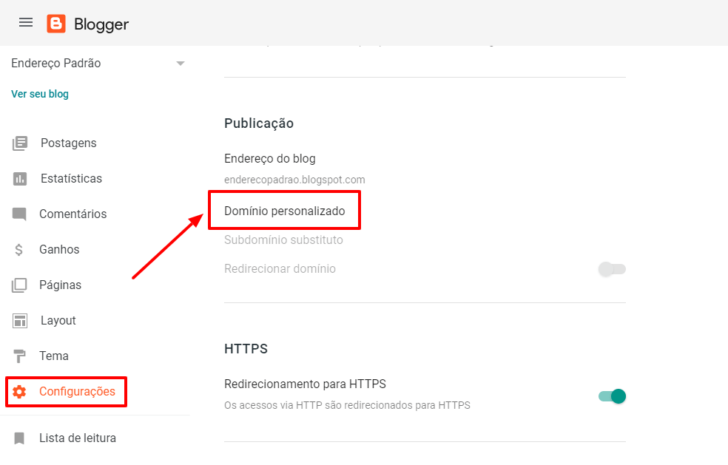
Begin with the Blogger dashboard.
Navigate to the Settings page in the side menu, scroll down to find the Publishing section, and select Custom domain.
Enter the domain you have registered and wish to use in Blogger in the window that appears. Make sure to include “www” before the domain, like www.mydomain.com.
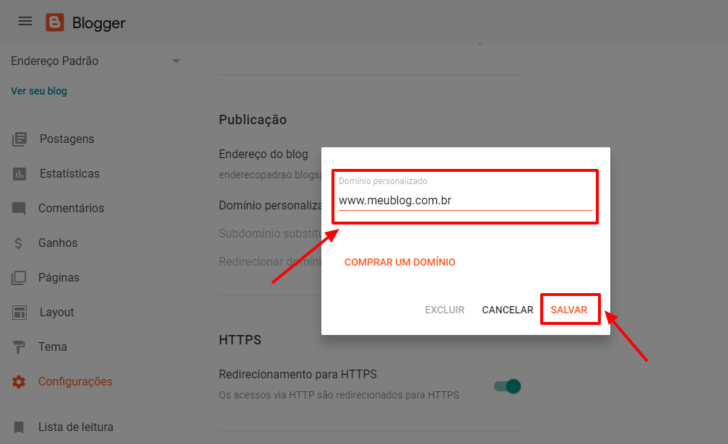
You can choose any name for the subdomain, like blog, on My domain. com.br. Simply substitute www with blog in the steps provided.
Clicking Save after entering the domain will result in an error message indicating the inability to confirm your authority for the domain. Pay attention to the red-highlighted text for instructions on pointing your domain.
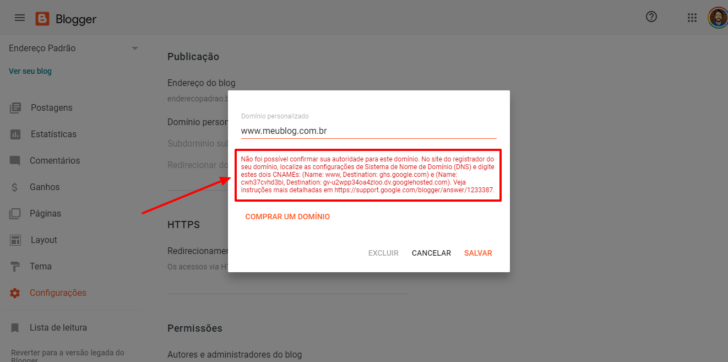
Please keep this page open as we will utilize this information in the dashboard linked to your domain registration.
If you’ve accidentally closed the screen and can’t see the CNAME values, you can retrieve them through Google Search Console, as detailed in a video provided by Tiago Vieira. The link to the video is included here at the request of Mauro, who faced a similar issue.
Access the business dashboard where you signed up for the domain.
The steps provided are applicable to domains registered with any hosting/domain company, even if the domain was registered elsewhere. Just be aware that the tools may appear different.
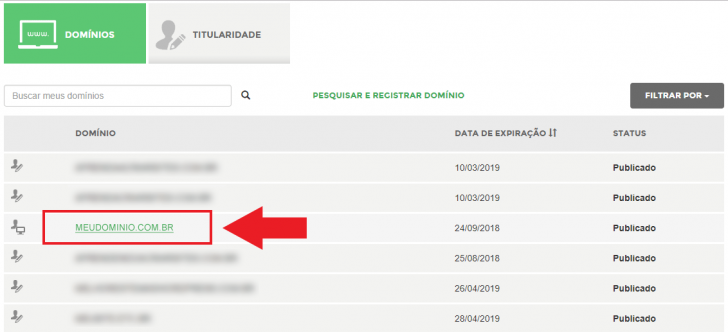
Access the Registry.br system using your login credentials, then select the domain you wish to connect to Blogger.
Navigate to the DNS section on the following page and select the Edit Zone option.
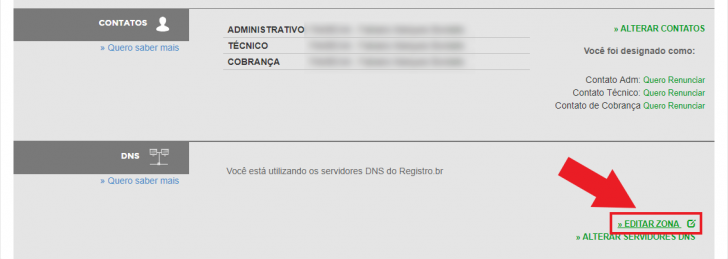
To modify the DNS zone in the Registry. br, the domain must be connected to the Registry servers. br. If you do not see this option, switch the company managing your domain’s DNS.
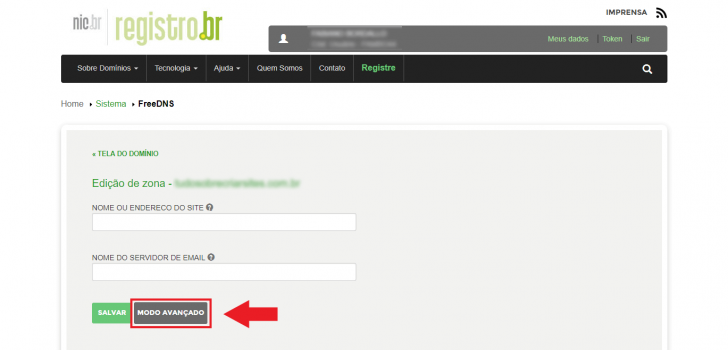
Click on Advanced Mode if you see the screen below; otherwise, proceed to the next step.
chsyys/FreePik
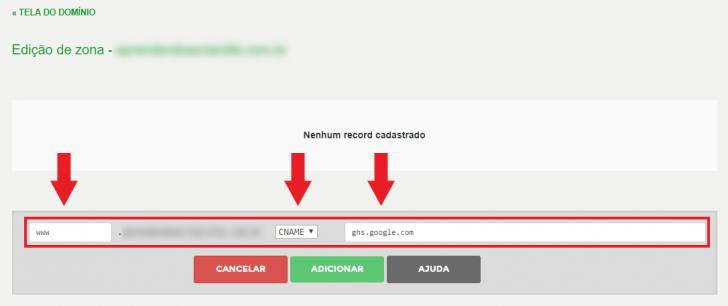
Click the Add button on the zone screen. Enter “www” in the first field, select CNAME from the dropdown, and input “ghs.google.” in the last field. Finally, click Add to save the changes.
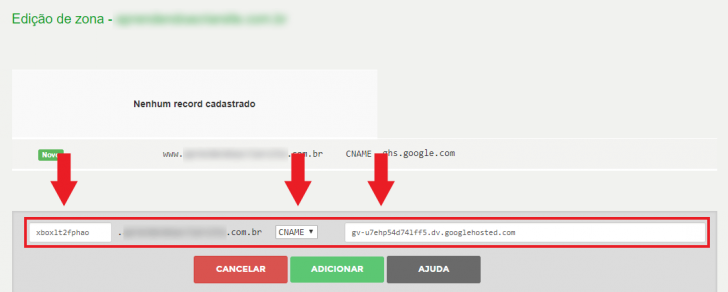
Repeat the process of adding the CNAME, but now input the specific values mentioned in the error message highlighted in red. These values are unique to each domain, so go back to the Blogger dashboard to find the values specific to your blog. The CNAME entry will consist of a code in the first field and a longer one in the second field.
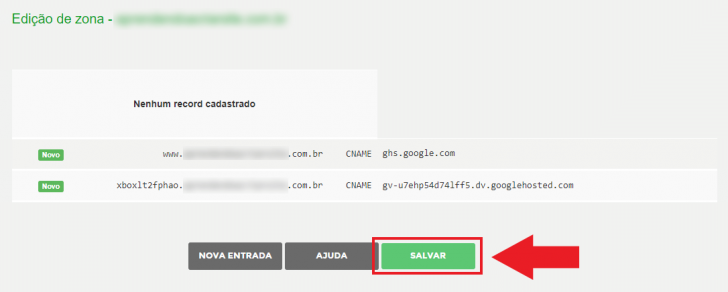
After inputting the two CNAME values, press the Save button on the Registry.br panel. Ensure that the modifications have been saved in the system if you are following the process in a different organization.
After completing the procedure up to this point, your domain is prepared to function on Blogger. Wait a short period of time, maybe a few hours, then attempt to visit your blog’s address using a web browser.
If you have reached this page using the www version, it’s the only one that will function. To ensure both versions (with and without www) of your blog address work, additional settings are required.
Set up the redirection of the non-www version of your blog.
To ensure your custom domain in Blogger works without the www prefix, additional DNS entries need to be added to the Registry’s DNS zone. If your domain was registered with another company, you can still follow the tutorial, noting that the panel images may vary. The process for adding DNS entries is consistent with what is outlined in this tutorial.
Return to your domain zone editing panel and click on the Add button to add new DNS entries. This time, we will be adding A-type entries, with a total of 4 entries.
CNAME entries only allow domain names, while type entries only allow IP addresses. IP addresses represent devices connected to the internet, such as the Blogger servers we will use.
Insert the IP addresses of bloggers into your domain’s admin panel. For this insertion, leave the first field blank and only select option A in the checkbox, as shown in the screenshot.
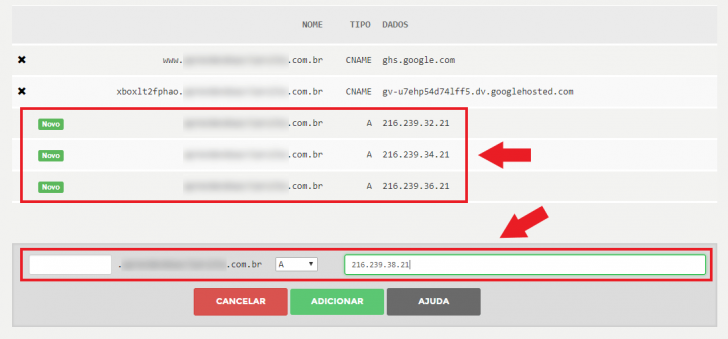
The following are the IP addresses you should use for the Blogger.
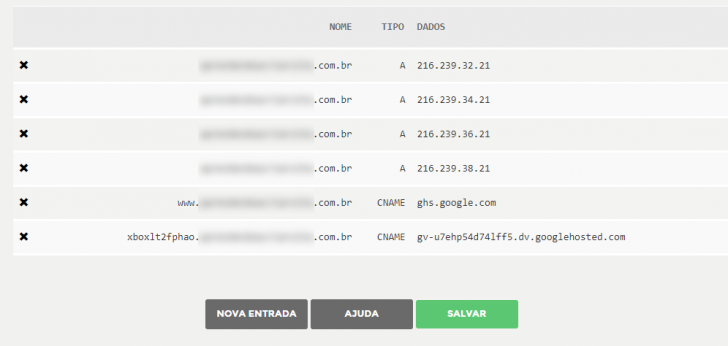
After entering the four IP addresses, ensure to save the modifications. Subsequently, you will be presented with a screen displaying both CNAME and A inputs.
Complete the custom domain setup by returning to Blogger.
After adding all entries to your domain’s DNS zone, go back to the Blogger dashboard to finalize the setup. Return to the Settings screen -> Publishing in the Blogger panel, and activate the “Redirect domain to www.yourdomain.xyz” option.
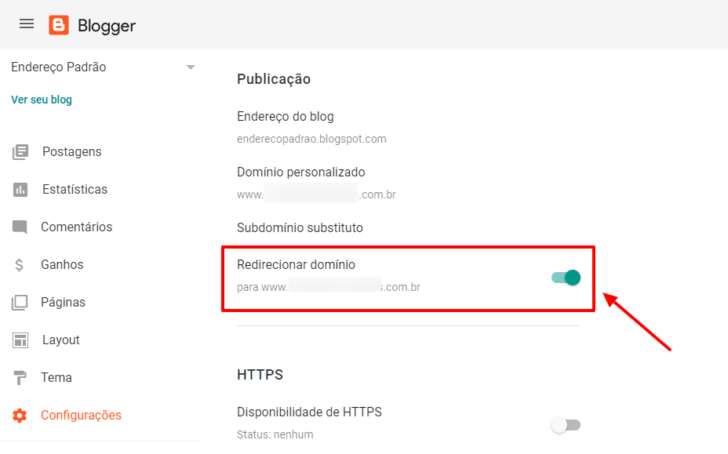
If DNS changes have been distributed and recognized by Blogger, no more errors will appear on the screen. After that point, visitors to the old address will be redirected to the new one.
Configure the secure version (HTTPS) of your Blogger site as well.
After setting up your custom domain on Blogger, it is crucial to enable the HTTPS version to secure the data transmission between the Blogger hosting server and your audience using encryption. This added security feature safeguards communication from potential interception by third parties, particularly in public wifi networks.
It is feasible to utilize the HTTPS protocol with a complimentary SSL certificate provided by Google for Blogger users, potentially leading to increased visibility in search results as Google has identified it as a ranking factor.
To activate HTTPS on your Blogger, navigate to the settings page and find the HTTPS section located below the blog address. Toggle the HTTPS Availability option to enable it.
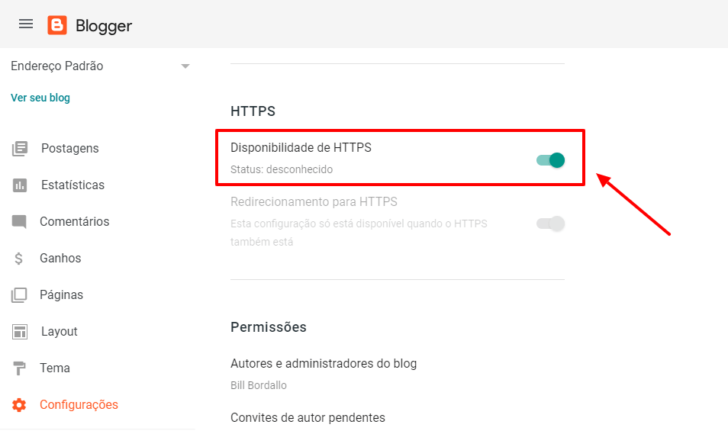
The system will generate an SSL certificate for your custom domain in Blogger if everything is set up correctly. Upon revisiting the page, the HTTPS redirection option should be activated. If not, you can manually enable it in the dashboard. In case of any errors, wait a bit before trying again.
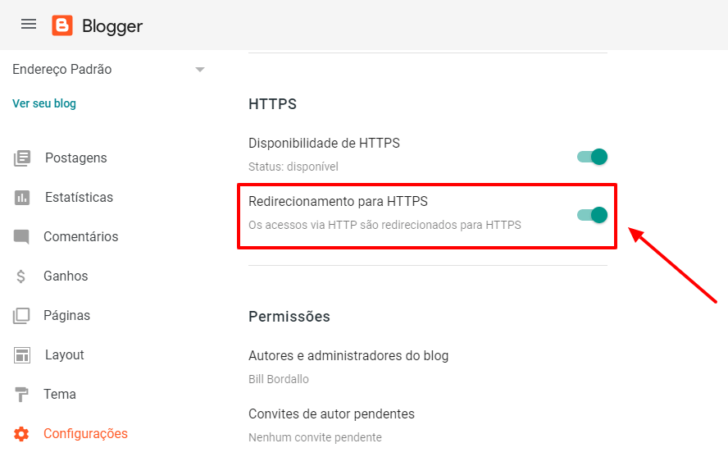
This setting automatically redirects all visitors to the secure version of your blog, which is strongly advised. For example, if someone accesses your blog using the HTTP version, they will be redirected to the HTTPS version.
For a more thorough guide on this process, refer to the article How to activate HTTPS on Blogger and the reasons for doing so.
How much time does it require for my new domain to become operational?
After logging the domain for over 24 hours, the new domain should start working approximately an hour following the DNS zone update. Nevertheless, it may take several hours for URLs with your previous blog address to redirect automatically.
If the domain is newly registered and the DNS zone settings have been modified, it may take approximately 24 hours for the change to take effect.
The DNS system gradually spreads changes over the internet, so typically, your new domain should be fully functional within 24 hours, but it may take up to 72 hours for this to happen. Check this article on domain propagation for further information.
Conclusion
If you completed this guide successfully, you have now added your custom domain to Blogger. I hope your blog is up and running smoothly! 😉
If you want to learn about the process without having a registered domain for your blog, consider this tip: You can get a custom domain on Blogger for under R $ 40 per year without any additional costs. Check out our recommended domain registration companies in the link below.
Published on 05/07/2018 and revised on 21/07/2025.
Blogger tutorials are tagged.