


Every year, new digital tools are introduced to satisfy the increasing needs of professionals and businesses seeking to build a website. Google Sites, revamped a few years ago, has been gaining popularity among users.
I will provide a detailed guide on creating a free website on Google Sites, covering account setup, website creation, and publishing. Additionally, I will discuss the pros and cons of using Google Sites and explain how to set up a custom domain within the platform. Let’s get started!
- What is Google Sites?
- To make a free website on Google Sites, follow these steps: Visit Google Sites, select a template, choose a theme, customize the site name and header, add a menu and pages, input content, and finally publish the site.
- Google Sites can be accessed.
- Select a pre-made or empty template to begin.
- Select a subject for the website.
- Edit the name of the website and the header on the home page.
- Develop the website navigation menu and design the pages
- Enter information on the website
- Publish the website.
- Creating a website with your own domain on Google Sites
- Advantages and drawbacks of building a website for free using Google Sites.
- Is Google Sites effective?
- Google Sites can be accessed.
- Start by selecting a pre-made or empty template.
- Select a topic for the website.
- Edit the name of the website and the header on the home page.
- Develop the website’s menu and pages.
- Submit information on the website
- Publish the webpage
What is Google Sites?
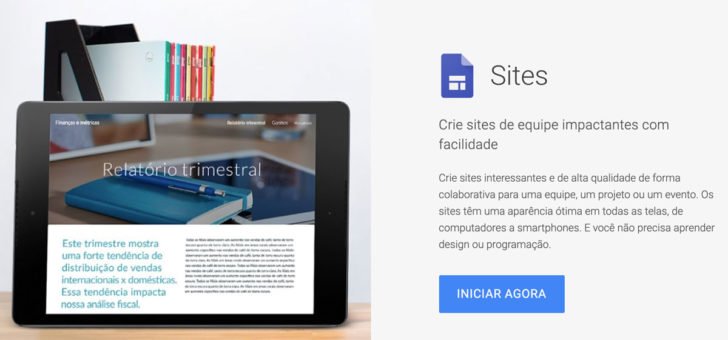
Google Sites is a tool provided by Google for creating websites for free. You can easily create and publish a website on the internet using Google Sites at no cost, and you have the option to use your own custom domain.
Google Sites can be used on various devices and can be collaboratively created. Users can access Google Sites for free with a personal or professional Google account. Users also have the option to control the visibility of the site, making it public or restricted to guests.
The tool can be used online without the need for any computer installation. Editing the website via mobile is not possible, but the tool has a user-friendly interface in Portuguese, making it easy for anyone to create a site on Google Sites without design or programming skills.
Google owns Blogger for creating blogs and Google Domains for domain registration, in addition to Google Sites.
Creating a free website on Google Sites can be done by following a set of instructions.
This outlines the process to make a website for free on Google Sites.
- Google Sites access
- Select a pre-made or empty template to begin.
- Select a theme for the website.
- Edit the name of the website and the header on the homepage.
- Develop the menu and pages for the website
- Add information to the website
- Publish the website.
In the upcoming tutorial, I provide a comprehensive guide with step-by-step instructions for getting your website published on Google Sites. 😊
1. Get entry to Google Sites.
To begin making a no-cost website on Google, access the Google Sites tool by visiting the https://sites.google URL and signing in with a free Google account or a Google Workspace account.

If you don’t have a Google account yet, select the “Create Account” option located at the lower left corner of the screen. Complete the necessary steps to set up your Google account and proceed to Google Sites.
Select a pre-made or empty template to begin.
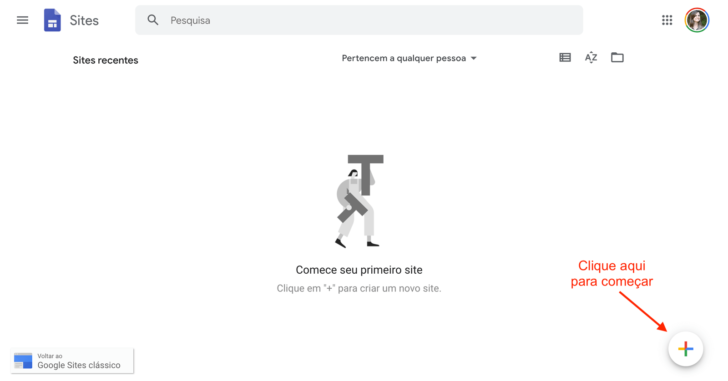
When you log in to Google Sites, you will see the main screen that displays all the websites associated with your account. You have the option to create several sites. To start creating your Google site for free, click on the “+” symbol at the bottom of the screen.
The home screen may display various templates from websites for you to select. You can opt for a “white” model or choose from the ready-made templates provided by the tool, which can be used as a guide for building your website.
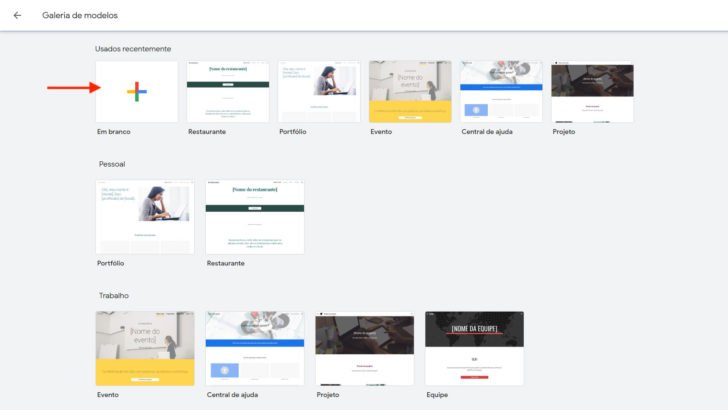
I decided to utilize a blank template to enhance the tutorial’s comprehensiveness. This choice will show an empty site that we will customize.
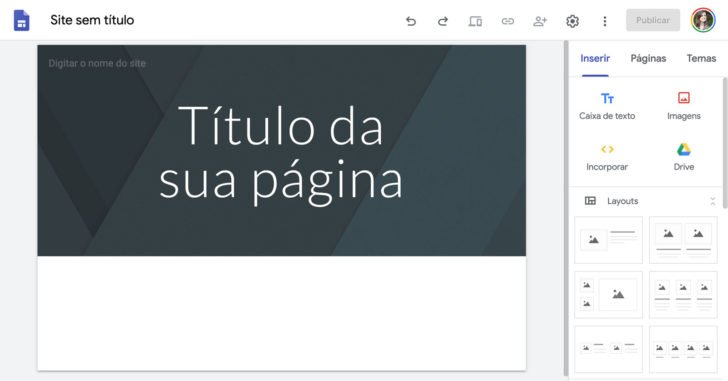
Select a theme for the website.
The customization of the website will begin by selecting a visual theme from the limited options provided by Google Sites, allowing you to create a free website with a distinctive appearance.
Google Sites provides 5 theme choices with various styles. Select the theme that best suits your website. For this guide, I opted to design a fictional bakery website and selected the “Diplomata” theme. Each theme can be previewed by clicking on it.

chsyys/Pexels
Edit the name of the website and the header of the homepage.
Starting with the simplest option when building a website can make the process easier. It is suggested to begin by changing the site name and the homepage header to get familiar with the tool and have a better understanding of the site’s requirements.
chsyys/UnPlash
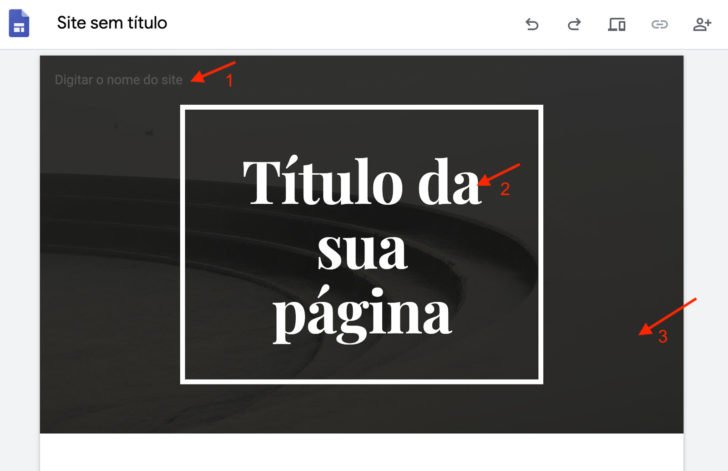
Editing the name of the website
Initially, we will input the website name to be shown on all pages. You have the option to insert a logo or simply type the website name by selecting the designated area (refer to number 1 in the image).
Click on the field to upload your logo in the tool. Select “add logo” if you do not have one and wish to create it using a free logo creation tool available for website use.
Clicking on the “add logo” button opens the settings window, where you can upload both the logo and a favicon. A favicon is a small icon representing your brand that appears in the web browser tab and other locations. To discover more about favicons, I suggest reading our article “Favicon: its significance for websites.”

Modifying the title of the page
It’s time to select a title for your website’s homepage, which could be the company name and slogan or a link to a key section of the site, as it is one of the initial elements the visitor encounters when entering the site.
Click on the current box and type in the preferred title. Customizations like changing the title, using bold or italics, adjusting alignment, and adding links can be made.

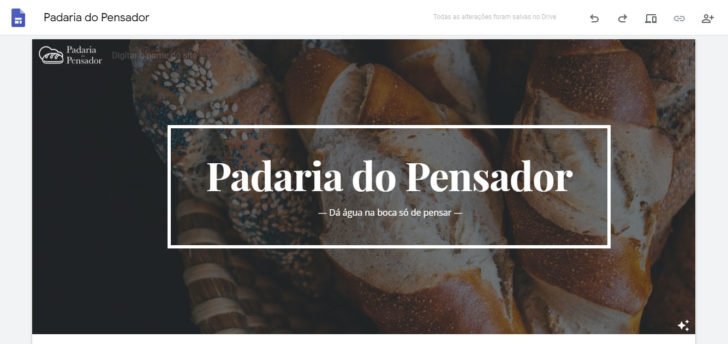
I opted to include the company name and a supporting slogan on this imaginary website. It is demonstrated in the screenshot that using different font sizes within the same text area is achievable.

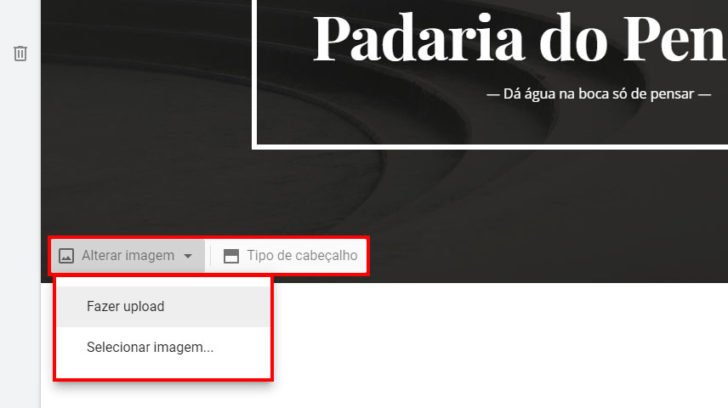
Resetting the background of the main site header.
It’s time to customize the main site header by selecting the image and choosing from the available options to change or upload an image.
Clicking “Select Image” will open an image gallery where you can choose an image from various sources such as URL, Google search, or your own saved images.
The image gallery is restricted. Using Google’s search feature is handy, but I advise against it due to the potential use of third-party images without permission. To access free images, I recommend utilizing image repositories. Check out our article featuring 11 recommended free image repositories for your website.
Another choice is to subscribe to a paid image repository like Shutterstock if you frequently require a significant amount of images, such as an agency.

I will utilize the free Unsplash image library, my preferred choice due to its wide range of beautiful photos, to build this website on Google Sites. The only downside is that it is only accessible in English, which can be easily resolved with a translator.
When adding a new image to the header, it appears significantly altered, as depicted in the image below.
Adjusting the size of the header.
The header in Google Sites can be easily customized with four different options for banner size, allowing you to enhance or remove the image as desired. Simply select the image and then choose from the available “header types” to preview and select your preferred design.

If the banner image is crucial, choose “Capa”. For a lighter option that still catches attention, go for “Banner Big”. If you simply want to illustrate the section, select “Banner”. If you prefer no image, opt for “Only title”. I decided to utilize the large banner on the homepage and the standard banner on internal pages.
Develop the website navigation menu and individual pages.
A website can consist of a single page or multiple pages, depending on its size and content. To demonstrate the resources for creating a free website on Google Sites, we will generate new pages. If you opt for a single-page website, you can disregard this section of the tutorial.
A basic website should include a minimum of three categories of information that can be converted into pages.
- Information regarding the business (such as our identity)
- Products or services, such as our offerings.
- Contact information (such as Where We Are or Contact Us)
Click on “Pages” located in the right section of the Google Sites editor to access all pages of the site. Use the “+” icon to add a new page.

When setting up a new page, provide a name for it (which will appear in the menu) and optionally specify a custom path (URL) for the page. If not specified, Google Sites will automatically assign one.
In the pages section of Google Sites, you have various options for customization, like designating an initial page, adding subpages, duplicating, and hiding navigation pages. Google Sites permits you to have up to four levels of subpages, a feature uncommon in free tools. It is advisable to limit the creation of excessive subpages to ensure a smooth browsing experience for your site visitors. Keeping your site simple and easy to navigate is recommended for optimal user experience.
Enter information onto the website.
With your website pages set up, it’s now time to add content. While this task may require some effort, it can typically be completed in a few hours for a basic site. For instance, my fictitious site was developed in just a single day (although this tutorial is taking several days… haha).
We will review all pages of the website in order to better grasp the required tasks. The final page to be tailored will be the homepage, as it serves as a presentation of the site, encouraging visitors to explore the internal pages.
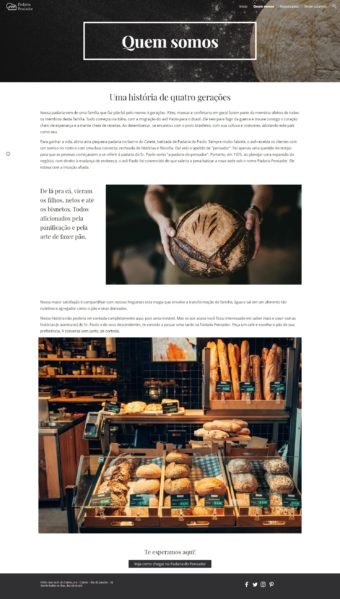
About Page
The “About” or “Who We Are” page is where you introduce your business, including the team if desired. It should feature a written introduction and one or more visuals such as photos, illustrations, or videos. It is recommended to use images directly related to the business for increased credibility and authenticity, but image banks can also be used for support.
Each page in my chosen theme features a header resembling the one on the homepage. I maintained visual consistency by incorporating the same design concept across all pages, with each header containing a background image and the page’s title centrally positioned.
chsyys/ShutterStock

Add an alternate text to inserted images to assist users with visual impairments. This text is read by screen readers and displays when an image fails to load. Provide a description of the image when inserting it, and consider adding a caption as well.
Creating content sections
Google Sites offers various pre-designed layouts to assist users in easily inserting content below the header. Simply select the preferred layout from the options provided in the “Insert” column of the editor’s right menu, click on it, and proceed to customize as needed.
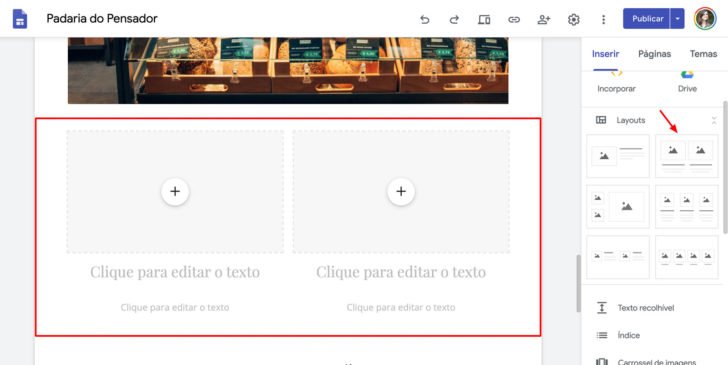
One tip for creating a webpage is to incorporate titles and alternate text with images, making the content more engaging and dynamic. Additionally, you can include various elements like images, text boxes, buttons, and more to enhance the layout and visual appeal of the page. Check out the example page I designed, which showcases the use of these features.
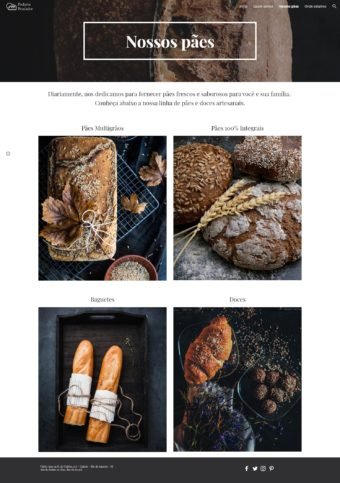
Product information and/or offerings
Every business website, regardless of whether it belongs to a company, a service provider, or a self-employed individual, should have a section to showcase the products or services they provide. It is advised to have a dedicated page for this purpose, although exceptions can be made if there is insufficient information to warrant it.
I demonstrated by making a page called “Our breads” and adding a small window displaying the different types of bread available. I utilized a pre-made layout tool for this purpose. This page can be expanded for numerous products or services, and it may also include subpages.
Contact Us Page
Contact information is essential on every website so that visitors can easily reach out if they are interested in your business. One suggestion is to include this information on a dedicated page and in the website footer.
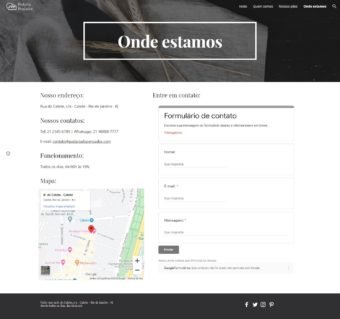
I designed a webpage on my imaginary bakery’s site where I included different ways to get in touch: the bakery’s location, phone numbers (including WhatsApp), a map, business hours, and a contact form.
The page contains texts, a map, and a contact form. You are already familiar with inserting text, so now let’s learn how to add a map and a contact form.
If you own a local business, consider setting up a Google My Business page to enhance your visibility in online searches. Learn how to register your company on Google My Business in this guide.
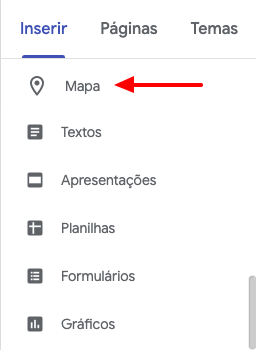
Adding a map
Entering a map on Google Sites is simple. Just go to the “Insert” section in the right side menu and click on “Map”.
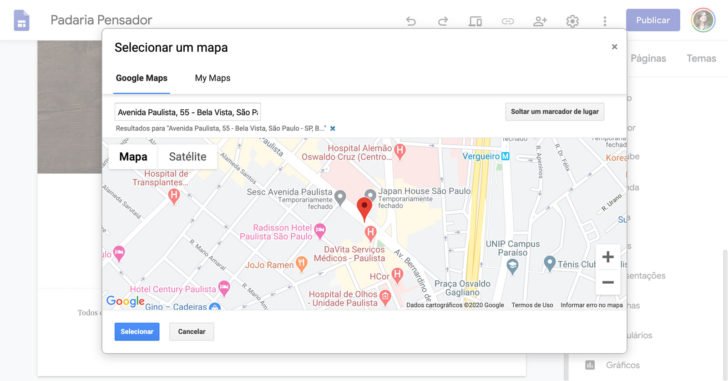
With the map window active, you can input your preferred address and select the “Select” button. This action will place the map on the website, allowing you to adjust its position and size. The appearance of the map is fixed as Google’s default and is non-customizable.
Adding a contact form
Visitors can easily contact through a form feature available on Google Sites in the “Insert” section of the side menu.
Before filling out a form on the website, you must first create it by accessing your Drive, where your Google account files are kept, and selecting Create > Google Forms as shown.

Enter the required fields and adjust the layout using the open form editor with the limited customization options available. Finally, save the form.
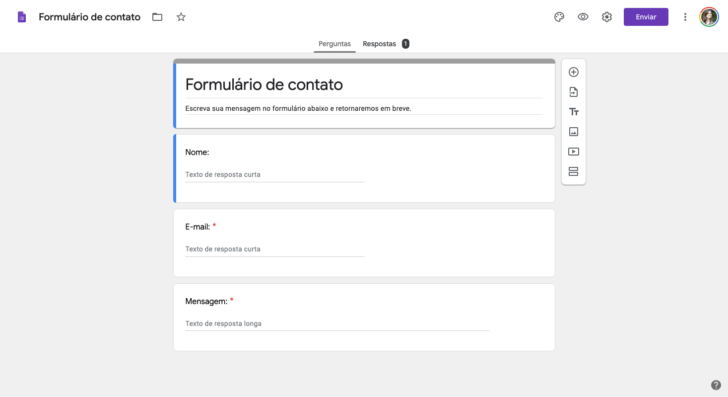
After completing this step, the form can be accessed within the Google Sites tool. It is important to use the same Google account or have access to the form created. Once inside the form, it can be adjusted in size and position on the page to create a more aesthetically pleasing layout. Despite its initial appearance not being optimal, with some adjustments, it can look good on the website.
Below is the final page result titled “Where are we” that I designed for the bakery website.
Footer of the website
Google Sites users have the option to customize the footer, which can include a secondary menu for larger sites and repeated contact information for local businesses, offering various customization possibilities.
In the bakery example, I decided to include the address, contact number, and social media icons to ensure that this information remains visible across all pages.

To customize the footer, simply click on the section and add the desired elements such as text, images, social media icons, and HTML codes. You can also choose to hide the footer if you prefer not to have one, although this is not common.
Adding social media platforms to the bottom section.
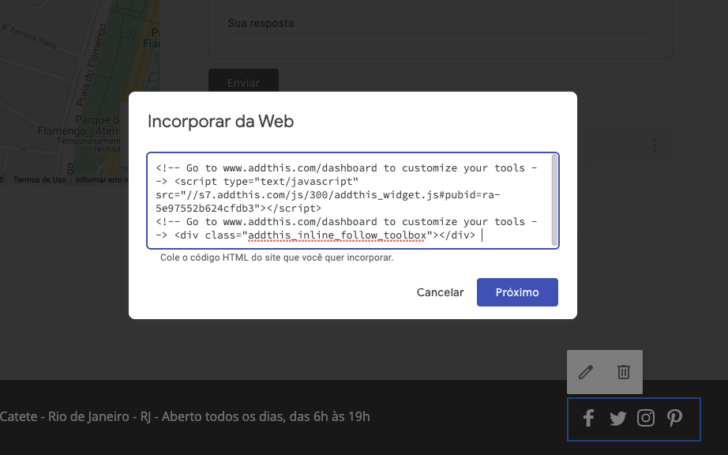
To add social network icons to your website, click on the “Incorporate” option in the “Insert” section, and then paste an HTML code into the window. You can utilize the AddThis tool for this purpose, specifically the “Follow Buttons” option that enables visitors to follow your social networks. AddThis will generate the necessary HTML code for you to paste in the designated window.
Adding Facebook Pixel
Facebook suggests placing the pixel code in the site header for it to be read at the beginning of the page load. However, this is not feasible on Google Sites. The alternative is to insert the Facebook pixel in the footer using the “Embed” feature. Instructions for this can be found on the Facebook help page under the “Manually add the pixel code to the site” option.
Residence (Home)
Now that the internal pages are completed, we can finalize the development of the homepage. I saved it for last because the homepage serves as a display of the website, emphasizing the most crucial elements.
To make sure the main topics are easily accessible on the website, it is advisable to dedicate a section for each internal page. Include essential information and a button or link for visitors to explore further. Additionally, consider adding distinct elements to the homepage to enhance its appeal.
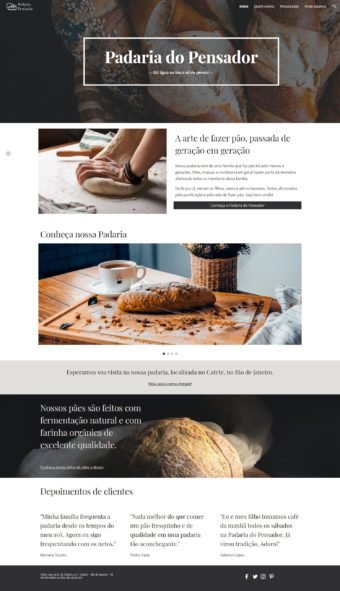
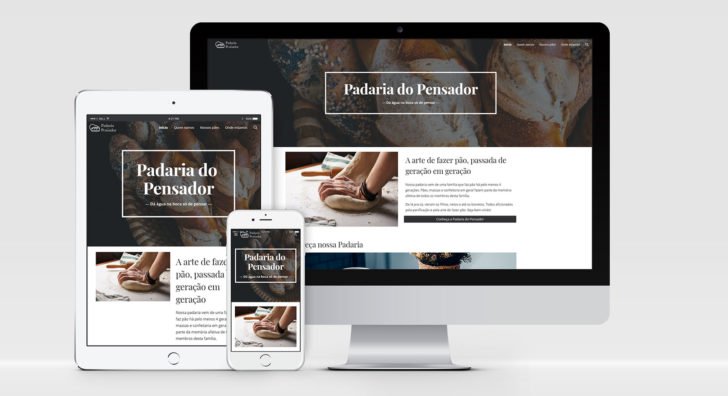
The home’s layout transformed to resemble that of a bakery’s website.
- We created a header at the start of the tutorial.
- Bakery section with image, text, and button linking to the “Who We Are” page.
- Section featuring a carousel of bakery images with the option to include links to internal pages within the images.
- Text inviting users to visit the bakery, with a link to the “Where We Are” page.
- Products section containing images, text, and a link to “Our breads” page.
- Customer feedback section organized in columns.
- Footprints (text and social media icons, like on other pages).
This format serves as a method for arranging a homepage, offering numerous options for customization. Take advantage of the ability to duplicate, drag, and resize content effortlessly to experiment with different layouts.
The result of the home page I designed for our made-up website can be viewed by clicking on the image to see it in a larger size.
Additional options are offered when establishing a no-cost website on Google Sites.
Google Sites, while basic in nature, provides numerous functionalities, some of which are highlighted below for their significance.
- Insert a video from YouTube.
- Inclusion of documents, slides, graphs, and Google sheets.
- Display of schedule.
- Adding index, buttons, and collectible text.
- Sharing configurations for a website.
- Configure Google Analytics.
I want to emphasize two features from this list that deserve a thorough explanation.
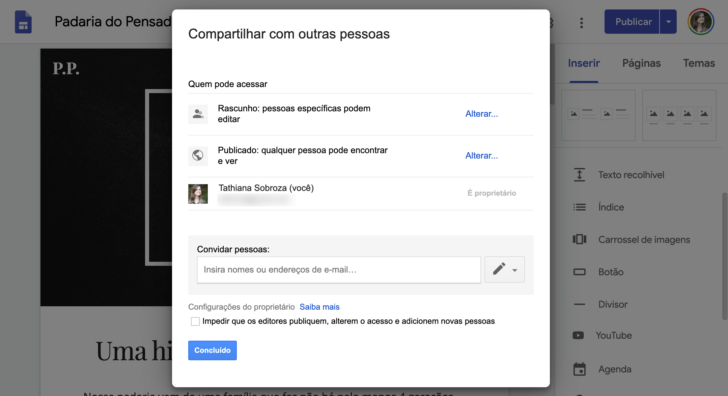
Sharing the website with others
By making a Google Sites page, it can be shared publicly or limited to specific invited users. While websites are typically public on the internet, there are exceptions. For instance, a business could design a site with internal rules and restrict access to employees only.
You can utilize this function to ask other users to work together on the website, enabling you to receive assistance in developing and maintaining your site.
To modify the site’s sharing settings, click on the share icon located in the top menu of the editor beside the settings icon. From the pop-up window, choose the preferred access option and then click on the “Done” button.
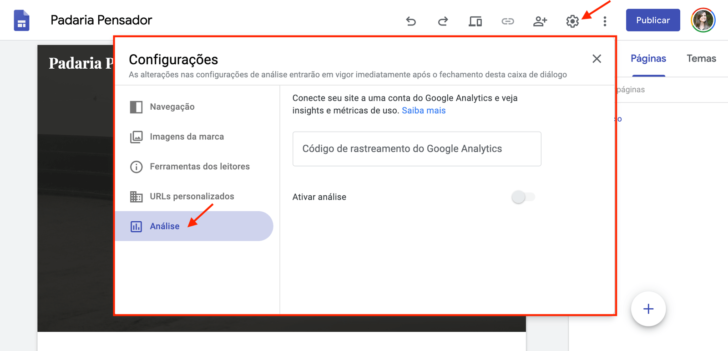
Google Analytics for data analysis
Google Analytics is a no-cost tool that provides data on website visits, allowing you to track user numbers, locations, devices used, and more. I suggest incorporating it on your site.
Enabling this feature on Google Sites is simple. Access the settings, go to the “Analysis” section, and input the Google Analytics tracking code. Refer to the image for guidance. If you do not have a Google Analytics account, follow the steps in Google’s tutorial to create one.
Publish the website.
We are now prepared to publish the site online. The next and final action is to click the “Publish” button! 🙂
It is now necessary to select a website address. The free domain version includes https://sites.google.com/view/ followed by your site’s name.
Other options that can be selected before publishing include:
- Custom URL refers to the insertion of your custom domain, if you possess one (in such a situation, I advise adhering to the instructions provided below).
- Specify who can view my website – indicate whether the site should be accessible to all or limited to invited users. This pertains to the sharing setting discussed previously.
- Leave the field disabled in search settings to allow search engines like Google to display your site in search results. If you prefer your site not to be visible, enable this option, especially during the site creation process. You can modify this setting anytime.

After making all the necessary adjustments, simply save and click “Publish”. Your website is now live on the internet and is accessible on all devices. Check out our bakery’s website by clicking on the following link. 🙂
Creating a personal website with your own domain on Google Sites
The default address provided by Google’s tool for websites is not user-friendly due to its length and difficulty in memorizing and sharing in printed and digital formats.
To address this issue, it is recommended to utilize a personalized domain that follows the format of www.domain.with. This not only enhances the appeal but also provides a professional touch to your website.
You can purchase a domain from a specialized company for around $40 per year. Some domains are available for less than $5, but it is important to consider the renewal cost. Check out the recommended websites for domain purchases in this comparison.
After registering the domain, you can link it to your website. Utilize our tutorial to guide you through configuring your custom domain on Google Sites.
Creating a free website on Google Sites has both pros and cons.
Google Sites offers numerous benefits and has garnered popularity among users. However, it also comes with limitations that may hinder certain online projects. Here are the pros and cons of utilizing Google Sites:
Benefits:
- It is simple to utilize.
- It doesn’t cost anything.
- Enables the use of a personalized domain (e.g. website.com.br). Domain registration is required prior to utilization.
- Themes are designed to be adaptable to various user devices like computers and mobile phones.
- It includes the SSL security certificate at no cost.
- It easily integrates with other Google tools such as Google Analytics.
Drawbacks:
- There are fewer themes available.
- There is limited flexibility to customize the site’s appearance and elements in comparison to alternative tools.
- The resources are more basic.
- Codes can only be inserted in the footer, not the header, such as Facebook Pixel or tracking tags.
- The custom domain is only functional with the prefix “www” (for example, website.com will not work; only www.site.com).
- The platform lacks a built-in blog feature, so I suggest using Blogger for a more robust blogging experience.
- It lacks the capability to have a virtual store.
- The editor can only be used on desktop computers, meaning it is not feasible to make edits to the site from a mobile device.
- It offers restricted compatibility with external tools.
Is Google Sites considered effective?
Google Sites is a useful tool for creating basic and efficient websites, although there are other free website builders available depending on specific site requirements. Google Sites is also suitable for more complex websites with specific features.
Consider opting for a paid website builder or a platform like WordPress if you require additional features or customization options. Explore top website creators or learn how to set up a WordPress site.
I hope you found this tutorial helpful in making a website on Google Sites. Feel free to ask any questions or share your thoughts on the tool by leaving a comment! 🙂
Publication date: 22/04/2020 (latest update on 16/06/2023)
Google Tags are associated with Google Sites.