


Google stated over 4 years ago that utilizing HTTPS can improve a page’s search result ranking. Since then, the use of this protocol has grown significantly. Additionally, many companies now provide free SSL certificates. Furthermore, in 2018, browsers began flagging websites without HTTPS as insecure.
It is now expected for every website to have an SSL certificate and use the HTTPS protocol, which is easy and affordable to obtain.
Blogger users can now get free SSL certificates easily with just a click of a button.
Learn how to enable HTTPS on Blogger by following this tutorial.
The significance of having an SSL certificate for your blog, or the reasons for using HTTPS
HTTPS is an internet communication protocol that enhances security compared to the traditional HTTP protocol.
In HTTP, data is transmitted as plain text, making it vulnerable to interception. In contrast, HTTPS encrypts data during transmission, ensuring that only the sender and receiver can decrypt it.
The implementation of HTTPS has led to various enhancements in data protection on the internet. Notable improvements include:
- Once data is encrypted, neither internet providers nor hackers can observe the information being accessed.
- A frequent scam, often seen in public wifi networks, involves altering a genuine website to show misleading information to users, with the aim of stealing data or tricking people. Such scams are not feasible in HTTPS connections.
- Sensitive information, like credit card details and passwords, is safeguarded through encryption when conducting transactions online. Therefore, it is advisable to make online purchases and logins exclusively on websites with HTTPS.
- Basic SSL certificates verify the domain of a website to confirm its authenticity, providing users with assurance that they are accessing the intended site and not a fraudulent one trying to impersonate it.
Browsers have labeled websites without HTTPS as “unsafe” in addition to the points mentioned.
Requirements for utilizing SSL on Blogger
Anyone with a Blogger account can obtain an SSL certificate and utilize HTTPS on Blogger without any limitations. The only requirement for using an SSL certificate on Blogger is having a blog or website on the platform.
HTTPS is automatically activated for Blogspot subdomains like myblog.blogspot.com, and there is no need to take any action because all blogs with a blogspot subdomain are automatically redirected to the HTTPS version of URLs.
If you have a custom domain such as your blog’s address (e.g.: myblog.com), you must manually enable HTTPS. When it comes to custom domains, using HTTPS on Blogger is not mandatory, but it is strongly advised.
Using a custom domain on Blogger is free, unlike other platforms that typically charge for this feature. The only expense involved is the domain registration, which can be completed through various registration companies. Simply adjust some settings to link the domain to your Blogger account. To learn more, refer to a tutorial on setting up a custom domain on Blogger.
Setting up HTTPS on Blogger in a detailed manner
Install an SSL certificate on Blogger by following the step-by-step guide to enable HTTPS on all pages of your blog.
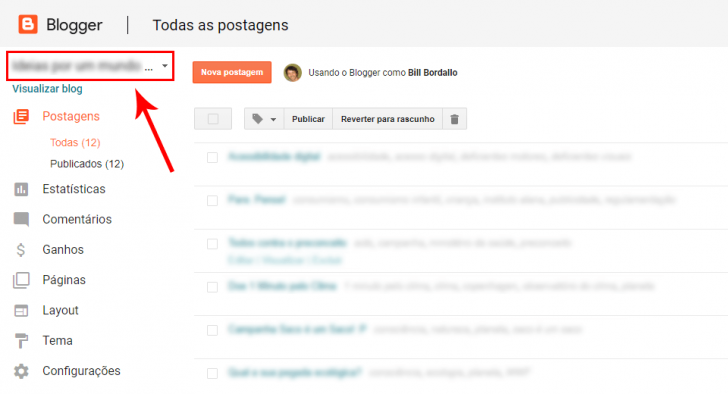
Access Blogger and find your blog.
The initial stage involves logging into your Blogger account and selecting the desired blog for HTTPS configuration from the drop-down menu located in the top right corner.
Access the menu for settings.
Once you choose the blog, navigate to the basic settings section of the specific blog. You can find it in the side menu under Settings -> Basic.
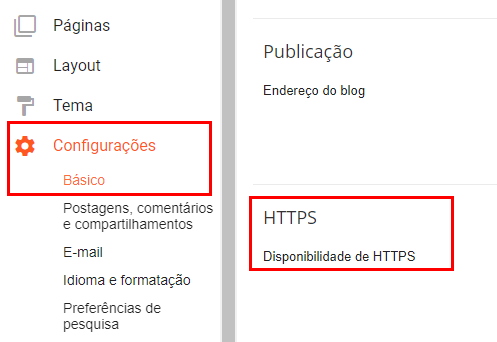
3. Activate the HTTPS protocol.
On the settings page, find the HTTPS section and set the HTTPS Availability option to Yes. A warning message will appear on the screen, indicating that the HTTPS availability is being checked.
chsyys/Pexels
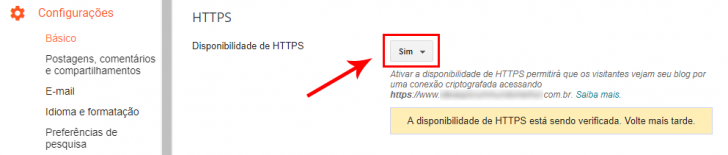
An SSL certificate is issued to the domain during the verification period through an automated process that checks the domain’s configuration on Blogger servers. Cryptographic tests are conducted, and if successful, a unique certificate is issued exclusively for that domain.
The SSL certificate is issued quickly after the request. To confirm, simply refresh the page. If successful, the verification message will vanish.
Visitors can access both the HTTP and HTTPS versions of your blog pages during that period.
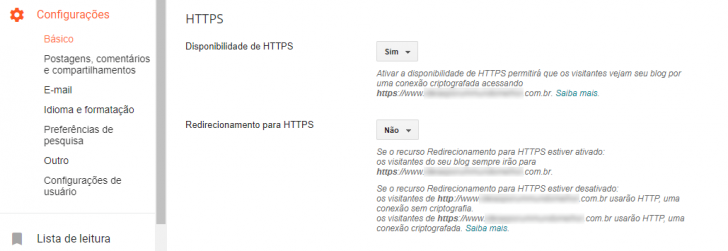
Just below the section for enabling HTTPS, there is another option to activate HTTPS redirection, which should also be set to Yes. It is advisable to verify your blog before enabling this redirection feature.
After setting up HTTPS on Blogger, what steps should be taken next?
Before enabling the redirection of all your blog’s URLs to HTTPS, it is crucial to verify that no errors are caused by insecure content, such as images or other elements loaded with HTTP URLs in your posts.
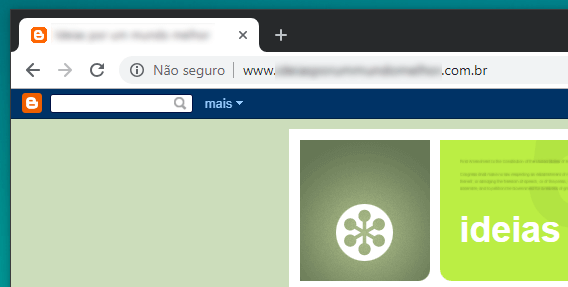
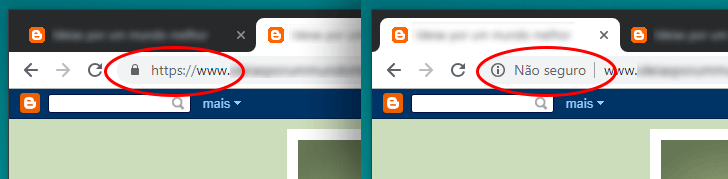
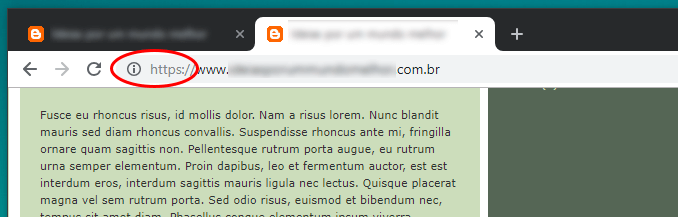
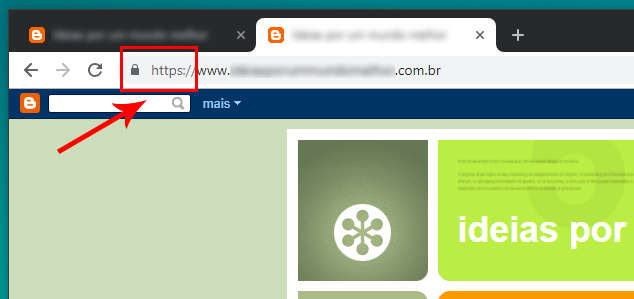
To confirm, visit your blog using the HTTPS URL and check for a closed lock symbol next to the page address. If the lock is closed without any warnings, then it should be safe.
chsyys/Pexels
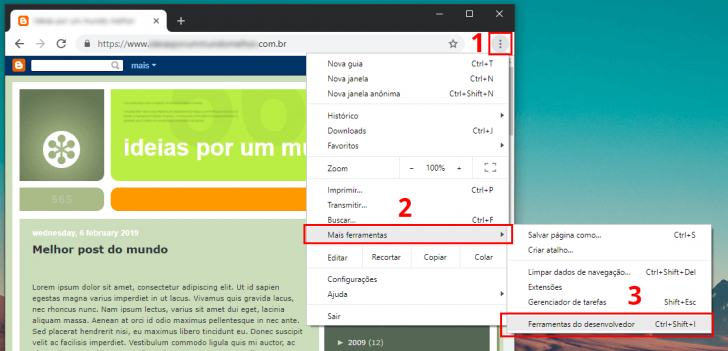
If there is a “Not safe” warning, there might be mixed content present. To verify, access the browser console by following these steps in Chrome: menu (three dots) -> More tools -> Developer Tools, or press “F12”.
A red x icon with a number appears in the top right corner of the window if there is an error. Clicking on this icon opens the console where error messages and warnings can be viewed.
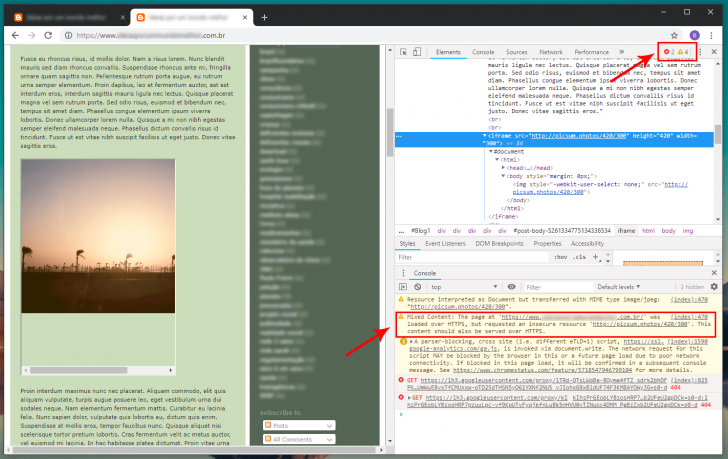
The orange warning for “Mixed Content” indicates that the page has a valid SSL certificate and is loaded with HTTPS, but some elements are loaded with HTTP.
Fix mixed content issues (mixed content)
The error message shows the URL of the element being loaded via HTTP. Once you find this, fixing it is straightforward by updating the URLs to HTTPS in the post editing section.
If the URL is external, ensure that the HTTPS version is accessible. If the element does not have an HTTPS version, substitute it with one that does. Images can be uploaded directly to Blogger, where the HTTPS version will be automatically used.
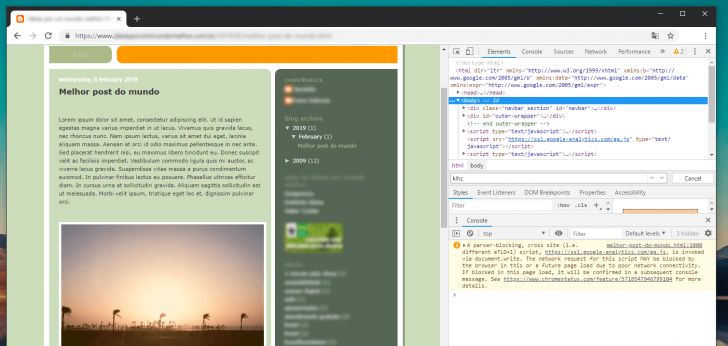
After correcting the URLs, update and then check the article using the console to ensure that the Mixed Content errors have been resolved.
Enable the option for redirecting to HTTPS
After confirming that there are no mixed content or loading issues on your blog pages related to SSL certificate and HTTPS browsing, the final step in setting up HTTPS on Blogger is to make sure that all your blog visitors access only the secure version of your pages, which includes HTTPS in the URL.
Redirecting guarantees that your blog will not produce duplicate content, which could lead to a decline in Google ranking. Implementing this practice is beneficial for optimizing your website for search engines.
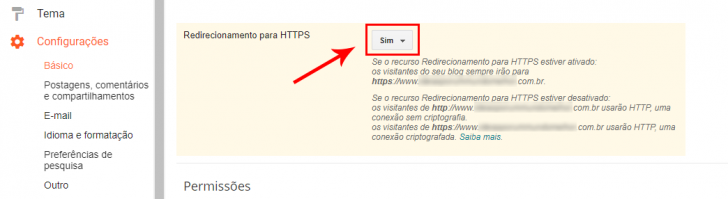
Redirect activation can be found in the same location, under Settings -> Basic. On the page, locate the HTTPS redirect section and switch the selection to Yes.
The modification is saved instantly and can be verified by accessing your blog through the HTTP protocol at http://www.myblog.com. You will then be automatically redirected to https://www.myblog.com.
Use the browser’s private browsing mode to prevent saved redirect cookies from being activated when you access the website.
Add your blog to Google Search Console.
Google Search Console is a no-cost tool for monitoring and enhancing website visibility on Google search engine. It provides data such as page appearances in searches, clicks on site results, search terms driving traffic, and other relevant insights. If your blog isn’t already registered, take action immediately.
Blogger user registration on Search Console is straightforward. Simply go to Search Console and select to add a property.
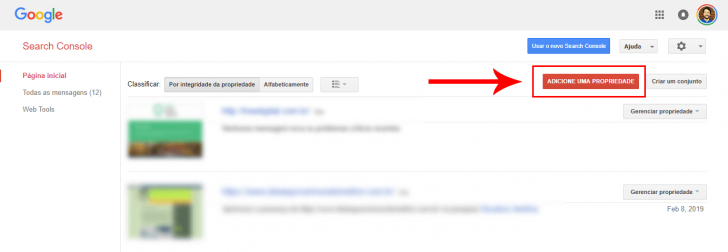
Provide the complete address of your blog, including HTTPS, in the window that appears, and then select Add.
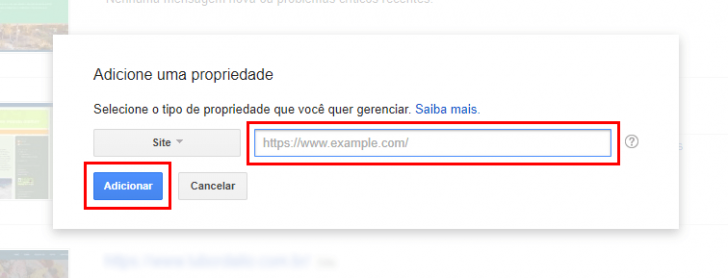
After submitting your site, it might take a couple of hours for the platform to show details about your site, especially if it’s a new website. Nonetheless, the information provided is thorough and valuable.
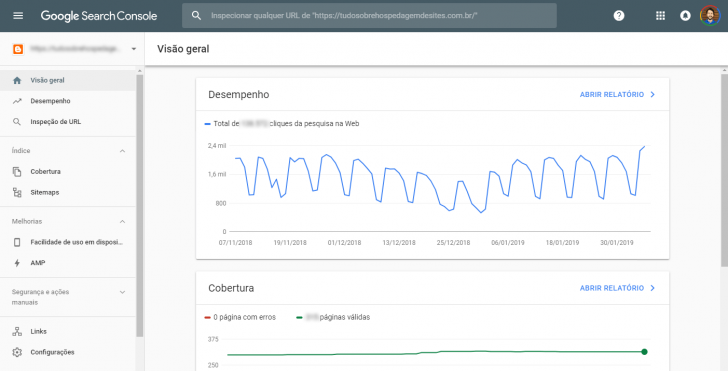
The GSC team is enhancing the interface, allowing users to switch between the old and new panels, both of which contain similar information but are displayed in different ways.
Google Search Console is an essential tool for any website aiming to improve its visibility in search engine rankings. Visit the designated Google webpage to gain further insights about this platform.
Summing up
The SSL installation process in Blogger is one of the easiest compared to other platforms I have used, such as blogs on hosting servers. It may be slightly more straightforward on platforms that default to HTTPS for all accounts, like some website creators.
After setting up SSL on Blogger, you can establish a professional email with your custom domain, such as name@yoursite, even for free. Discover how in this guide on creating a professional email for yourself or your business.
Publication date: August 2, 2019
Blogger, SSL, and Tutorials are the key topics.