


A website needs a domain and hosting for it to function. The domain serves as the site’s address (e.g. mysite.com), while hosting is where the site’s files are stored and made accessible online. It is not required to obtain the domain and hosting from the same provider.
A small setup is needed for the domain to be linked to the hosting. This setup involves assigning a DNS name, which stands for Domain Name System. This system acts as a global web address directory connecting domains to hosting servers.
Follow this guide to learn how to connect a domain with hosting and be able to do it independently on any system or hosting platform.
How to direct a domain to hosting
To direct one or multiple domains to a hosting service, we must follow these steps:
- Prepare the server for hosting the domain.
- Point Domain DNS for Hosting Server
- Wait for the expansion of DNS across the internet
Prepare the accommodation to be ready for the domain’s arrival.
The DNS system looks for the specified hosting server based on the server name provided at the domain registration location. If the server is not found or the domain is not present on the server, the change will be denied. Therefore, configuring the domain in the hosting is essential before redirecting the domain’s DNS.
The setup is done automatically if the domain was provided or registered when the hosting was purchased. If this applies to you, you can proceed to the next step without any further action. If the domain has not been set up in the hosting yet, follow the steps outlined below.
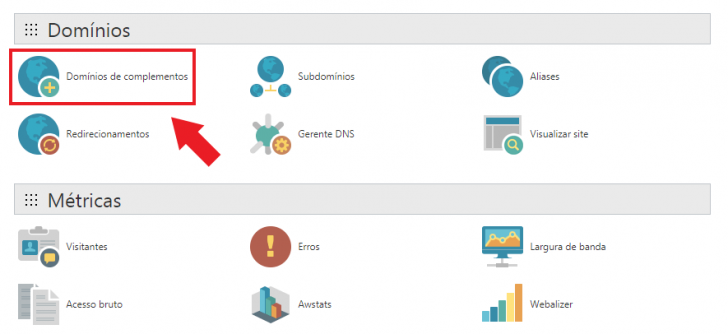
Access the control panel of your hosting and locate the domain administration section, the specific location may vary depending on the hosting company. If your hosting service uses cPanel, a commonly used control panel, navigate to the Addon domains section or its equivalent in Portuguese, labeled as Add-on Domains.
Add more domains to your GoDaddy account by following this link.
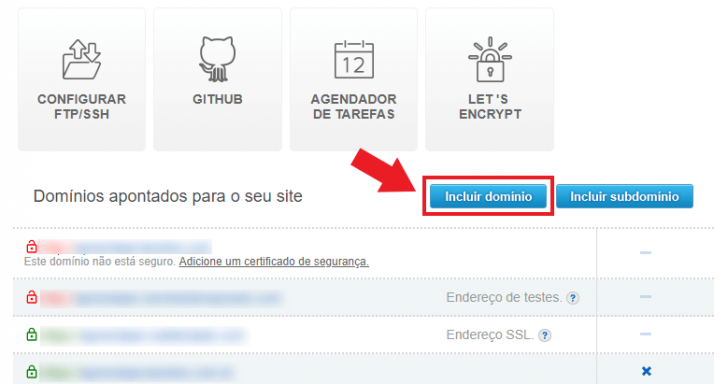
In accommodations without cPanel, adding a new domain is done in different sections with different names, but the process remains the same. For instance, in UOL Host and Locaweb, adding a new domain is linked to a hosting package and should be done in the relevant hosting section.
In UOL Host’s control panel, you can add a domain to your hosting by following this path: Hosting -> Menu icon in the active plan box -> Administrative -> Includes domain
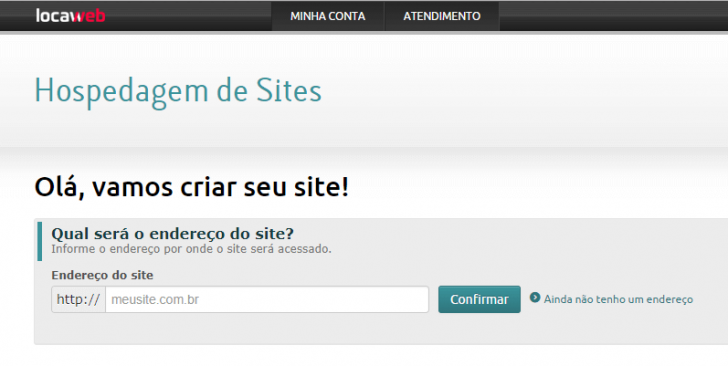
The domain needs to be included when setting up a new website on Locaweb’s hosting control panel.
After finding the location, input the desired domain to direct it to the hosting on the displayed screen. If your hosting package permits, multiple additional domains can be added to the same hosting.
If you have already provided the domain information when you signed up for the plan, you won’t need to do this step again.
Point the domain DNS to the new hosting as the second step.
We can now move on to the next step and learn how to connect a domain to the new hosting, which is crucial for ensuring they are linked effectively.
Initially, you need to log in to the local administrative panel where the domain was registered. From there, you should find the DNS management section, which might vary in name depending on the provider. Common terms could include “Change DNS servers” or “Change Nameservers”.
Examples of where server names (nameservers) are located in certain companies can be found here:
Registration on the website.
The DNS change, or nameserver, can be completed by selecting the desired domain and then clicking on “Change DNS Servers.”
For a detailed guide on updating your domain’s DNS in the Registry.br, click here.
GoDaddy is the subject of the text.
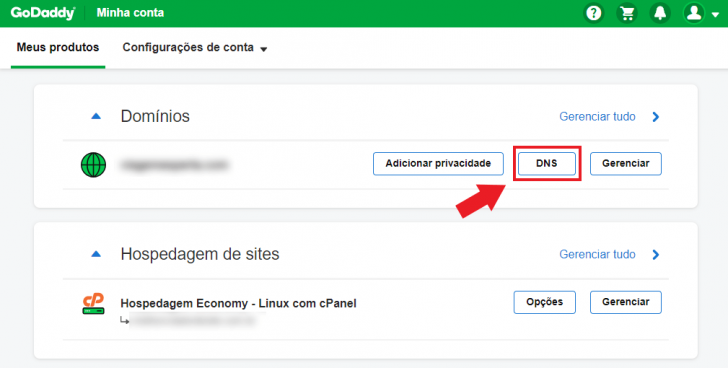
DNS management for domains registered with GoDaddy is handled in the client panel under Domains -> DNS -> Name Servers.
Here is a detailed guide on how to change DNS settings on GoDaddy.
HostGator:
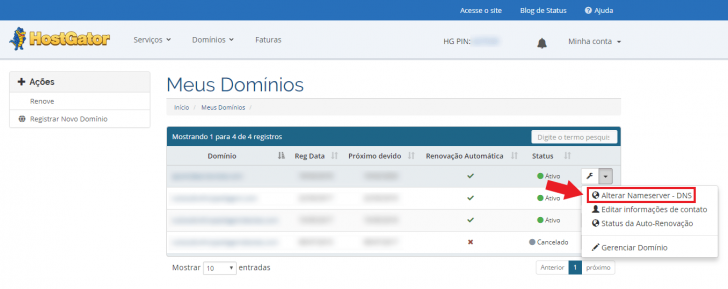
In HostGator, you can modify nameservers through the client panel by navigating to My Domains, clicking on the Setup icon, and selecting Change Nameservers – DNS.
UOL Host: UOL Host:
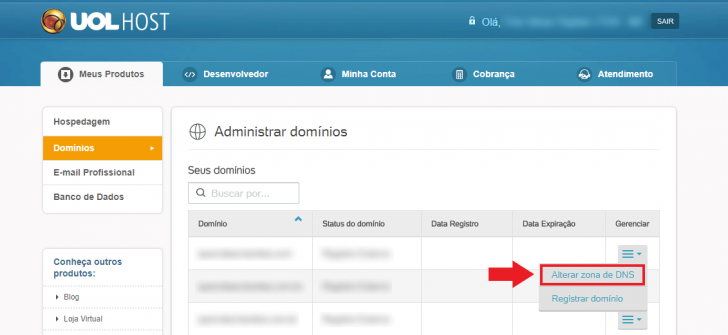
At UOL Host, the client needs to modify nameservers in the client panel under Domains -> Configuration icon -> Change DNS zone.
Once you access the DNS editing section, you need to input the NS values (abbreviated for nameserver) given by the hosting provider. Normally, the server names are shared post plan activation, either via email or the control panel.
The number of entries can vary and should be around two or more values.
Insert the values into the relevant fields in the company panel where the domain was registered. Examples are provided below.
HostGator:
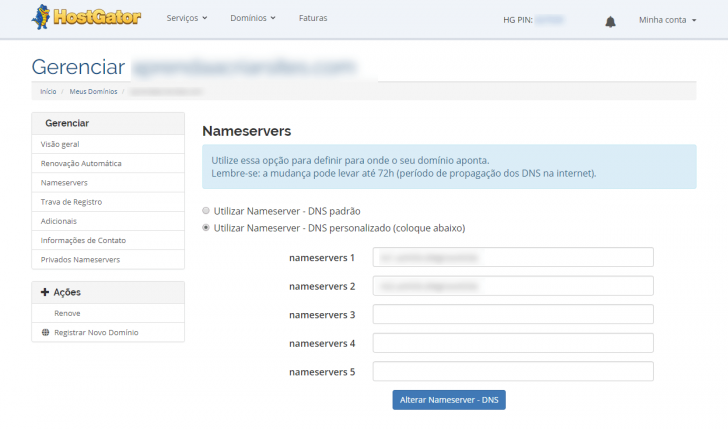
HostGator client panel displays the screen for changing nameservers.
GoDaddy:
chsyys/GettyImages

Change the server’s DNS settings within the GoDaddy customer panel.
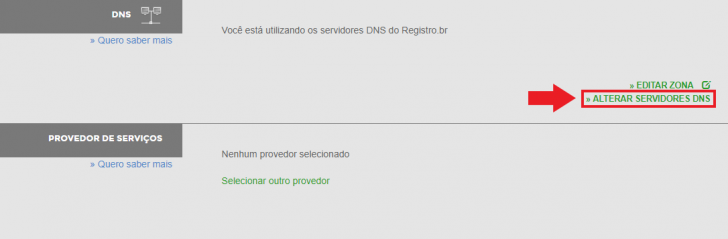
Locaweb:
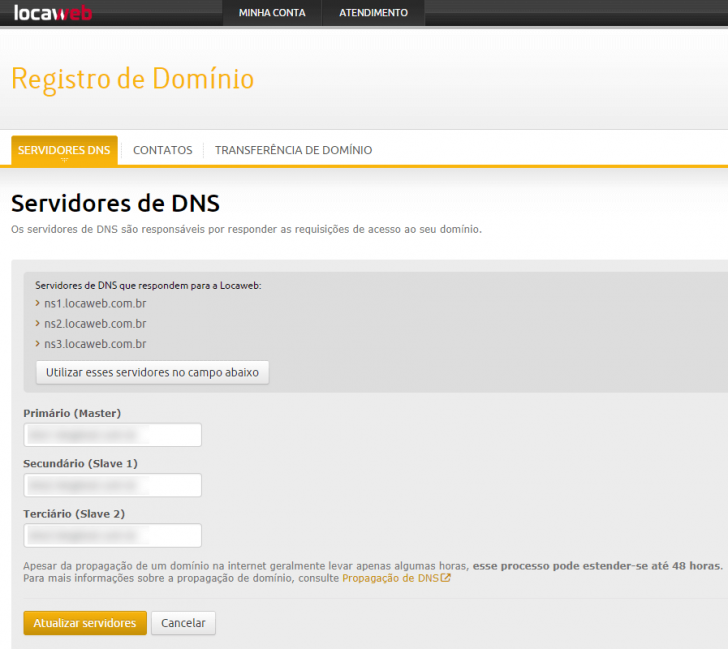
Change the server’s DNS settings within the Locaweb client panel.
Registration at br.
chsyys/iStock
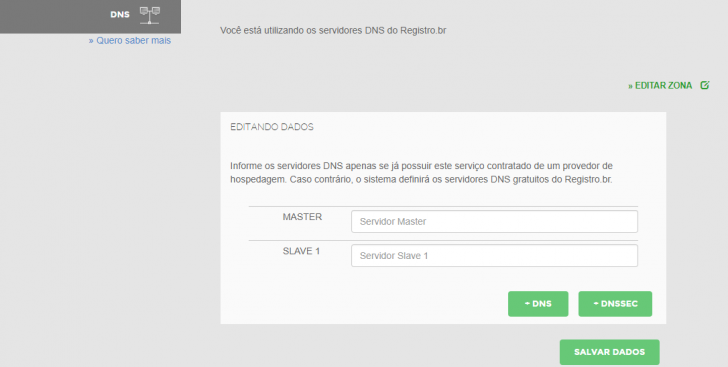
DNS servers in the registry system will be replaced.
Waiting for the DNS propagation is the third step.
After updating your domain’s DNS server to connect it to the hosting server, you must allow time for the change to propagate online. This propagation can take up to 72 hours, though typically it is completed within 24 hours. The delay is due to the decentralized nature of the domain name system (DNS).
DNS acts as a directory of web addresses, connecting domain names to hosting servers. When changes are made to the database, such as updating nameservers, this information is disseminated to DNS servers worldwide in a cascading manner, typically within 72 hours.
To find out more, refer to the article on how domains propagate online.
Hosting DNS management
This subject does not include specific guidance and provides only extra details about the topic. After learning how to link a domain to hosting, it’s useful to understand more about handling the DNS records for the domain.
After the nameservers are set for a particular domain, the hosting server will handle all DNS requests for that domain.
A domain can have various inputs aside from NS (nameserver), including A and AAAA inputs for IPv4 and IPv6, CNAME for subdomains, and MX for email service. When changing a domain’s DNS to point to a hosting server, all entries must be managed by the hosting provider rather than the domain registrar. Hosting companies typically provide a control panel area for managing these entries.
If you need to modify any DNS entry apart from the NS type, you should make the changes through the hosting company where your domain is directed.
In conclusion
I hope you’ve figured out how to direct a domain to hosting. If you encountered any challenges, feel free to leave a comment for assistance.
Now that your domain and hosting are up and running, why not move forward by beginning to build your website? If you’re unsure where to begin, check out the guide on creating a WordPress site in four simple steps and get started! 🙂
Published on 28/06/2018 and revised on 26/08/2020.
Tags: Registration.br, Tutorials