


WordPress is a widely used content management system that is found on around 30% of websites. It is highly versatile and can be utilized for a range of purposes, from basic blogs to complex online platforms like virtual stores.
WordPress can be set up on most hosting providers. This article will demonstrate how to install it on HostGator, a well-known American hosting company that has been in Brazil since 2008 and is highly favored in the country.
You can install WordPress on HostGator using either automatic or manual methods. Automatic installation is popular as it only requires filling in a few fields, while others may opt for manual installation for various reasons.
Click the appropriate link to go directly to the point and complete the installation successfully!
- Automatically set up WordPress on HostGator using Softaculous.
- Manually set up WordPress on HostGator
Install WordPress on HostGator using Softaculous for an automated setup.
HostGator offers automated WordPress installation through the cPanel using the widely used tool Softaculous. Learn how to install it easily.
Access the cPanel by following Step 1.
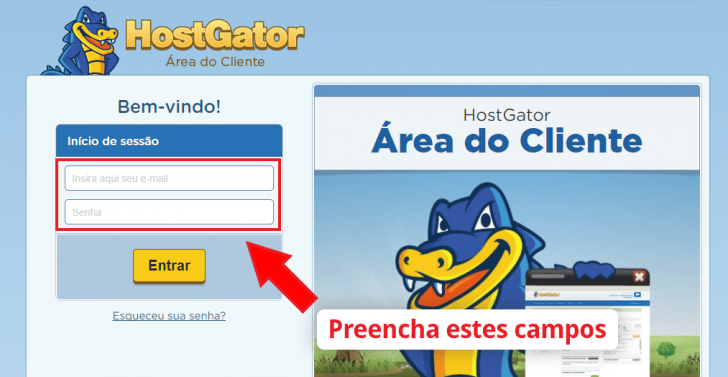
cPanel can be reached through the link provided in the customer area or via the specific cPanel address, which varies based on the hosting server. To easily access cPanel, use the login credentials created during the plan subscription in the client area.
Go to the customer section on financial.hostgator.com.br and provide your login credentials.
After logging in, you can see the services you have acquired from HostGator. Find your hosting plan and select the “cPanel” option.
chsyys/FreePik
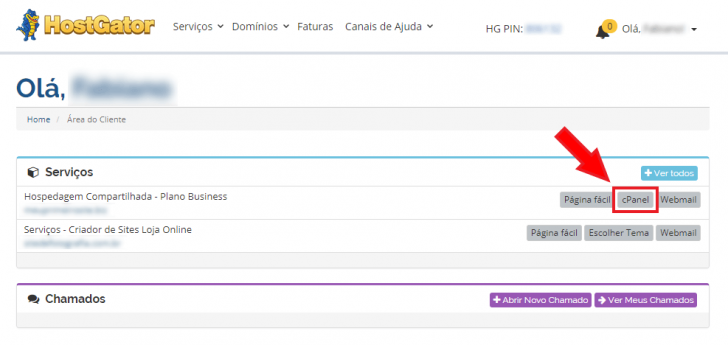
By clicking this link, you can access cPanel directly without having to log in.
Access Softaculous in the second step.
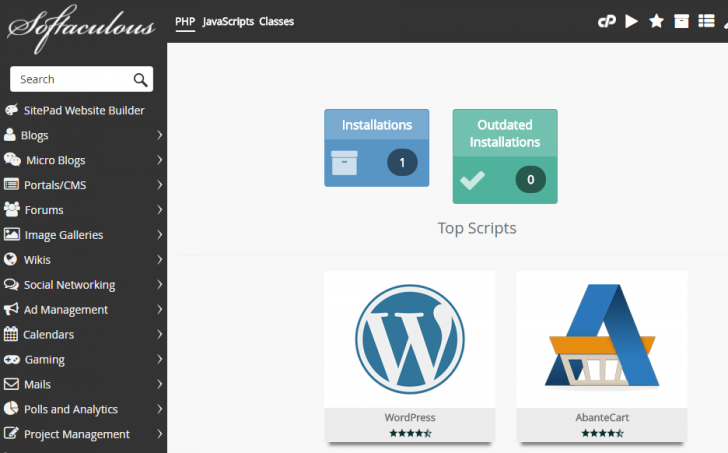
Once you are in the cPanel, find the Softaculous Apps Installer link. You can search for the app by entering its name in the search bar at the top of the cPanel, or simply scroll down to find Softaculous.
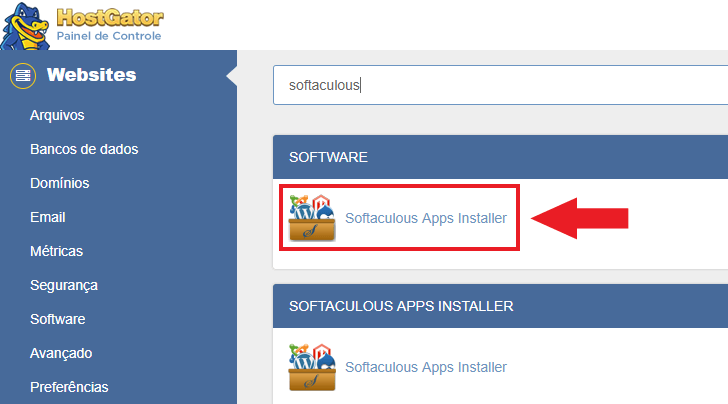
Softaculous, an all-in-one automatic installer, enables the installation of a variety of web applications and systems. Upon opening the tool, WordPress is among the initial choices presented.
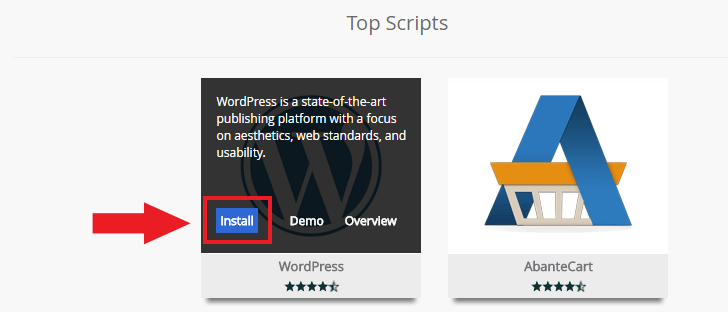
When you hover over the WordPress logo, a brief description of the tool will pop up in English. Below this description, you will find an “Install” button. Click on it to begin the installation process.
Complete the initial setup for WordPress in step 3.
Next, you will need to configure the fundamental settings of your WordPress website on the following page. Refer to the descriptions of each element provided below.
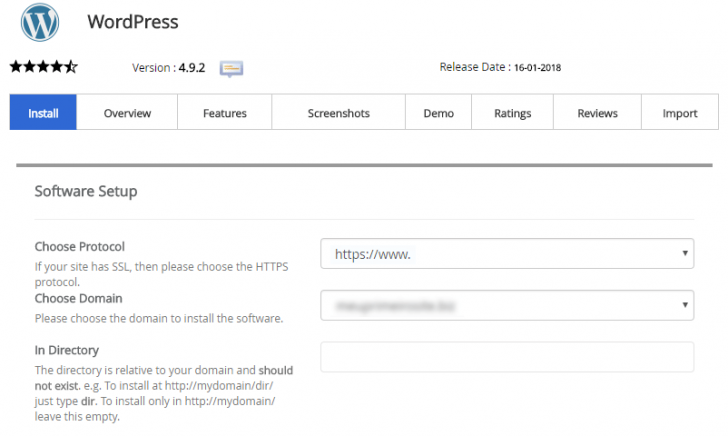
Define whether your website will use www and determine if the protocol will be HTTP or HTTPS. It is advised to opt for HTTPS with an SSL certificate installed on your domain. If you do not have this certificate, learn how to install a free SSL on HostGator for your primary domain.
Select Domain – This is where you select the domain for installing WordPress. If you have just one domain set up in HostGator, only that domain will be visible in this section. If you have multiple domains configured, they will all be listed here. Simply pick the domain you want and proceed.
You can choose to install WordPress on the main domain or in a subdirectory by specifying your preference in the Directory field during installation. Leave the field blank to install on the root domain, or enter a folder name to install in a subdirectory.
You will be required to complete the options in the “Site settings” section.
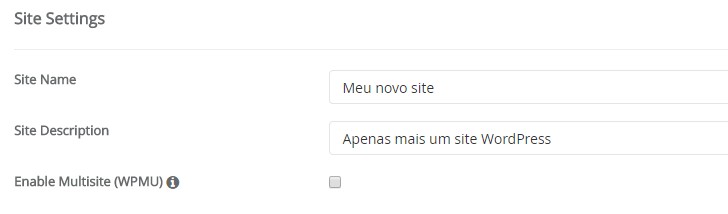
Site Name – Type your site’s name here (for example: Ricardo Blog)
Small description of your website: Discover everything related to technology and the internet here.
By selecting this option, you activate the WordPress multisite feature, which lets you control numerous WordPress sites from a single dashboard. If you don’t need multiple sites or are unsure, it’s best to leave this box unchecked.
The following step involves setting up a user and admin password for your WordPress site within the “Admin Account” section.
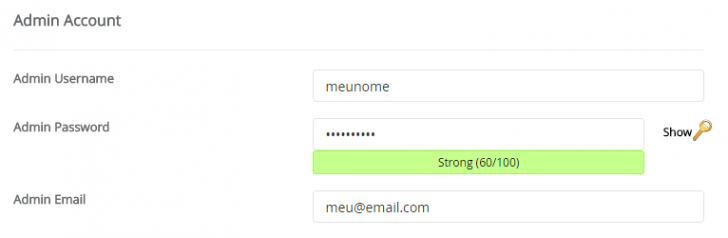
Inform the desired username for accessing the WordPress admin panel, for example, your name.
Create a password for the user being generated by entering it in the Admin Password field. For a secure password, click the key icon beside the field to generate one, save it for future use.
Email address for administration – This is the email address used for receiving WordPress notifications. It is necessary for this email address to be valid. Any email address that you can access, even if it is not within the site’s domain, can be used.
Next, you need to choose the language for your WordPress site and secure the login page.
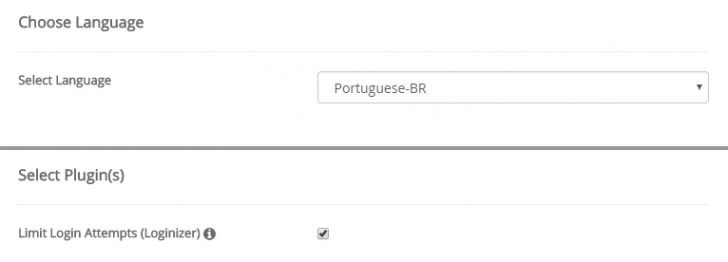
Choose a language for the WordPress admin interface, such as “Portuguese-BR” for Brazilian Portuguese. This language selection does not affect the site’s content, only the admin panel. You can modify the WordPress language at a later time.
Mark the box if you wish to install the Limit Login Attempts plugin, which safeguards the WordPress login page by temporarily blocking it following repeated login tries, providing defense against automated intrusion attempts.
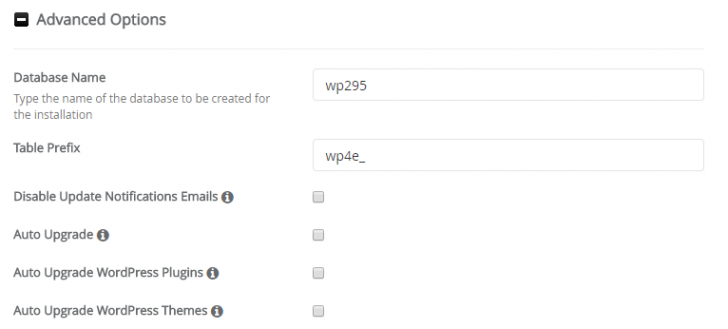
You can modify advanced WordPress setup settings on HostGator. Explore the available options.
chsyys/GettyImages
You can specify a name for the WordPress database, or Softaculous will automatically generate one if you don’t provide a suggestion.
It is possible to specify the prefix for WordPress tables in the Table Prefix field. The default prefix is wp_, but it is advisable to change it for security reasons. If no preference is given, the system will generate a random prefix.
Disabling the email notifications option in WordPress stops alerts for new releases and comments. It is advisable to leave this option unchecked to receive these warnings.
Selecting the Auto Upgrade option will enable automatic updates for your WordPress whenever a new platform version is released. It is preselected, and I suggest opting for this feature if you prefer not to deal with updates.
Automatically upgrade WordPress plugins – This feature allows for plugins to be updated automatically whenever a new version is available.
Automatically update WordPress themes – Select this option to have themes updated automatically upon release of a new version.
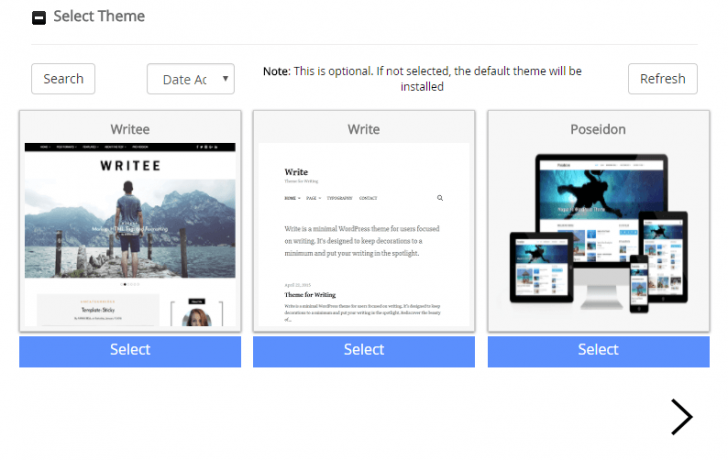
Before starting the installation process, you have the option to select a different theme for WordPress. This way, WordPress will be installed with a theme other than the default one. To preview the theme, hover over it and click on the “Demo” button.
We will opt for the Poseidon theme, which has a layout resembling an online magazine. To select this theme, click on the “Select” button below it. To explore more options, click on the arrow beneath the themes.
chsyys/FreeImages
Perform the installation of WordPress in Step 4.
To finalize the process and carry out the installation, simply click on the “Install” button. Remember to fill in the email field below the installation button to receive installation process information. Kindly provide your email address prior to commencing the installation.

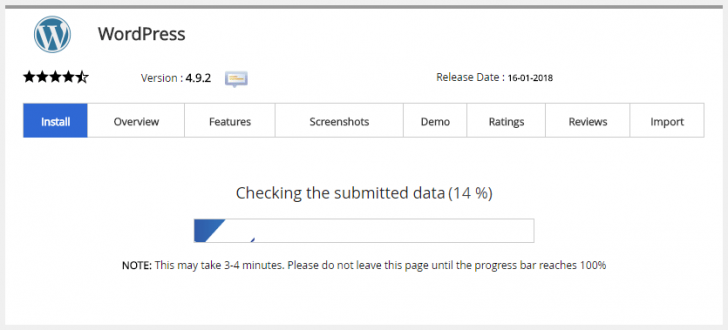
A progress bar will appear on the screen when you begin the installation process.
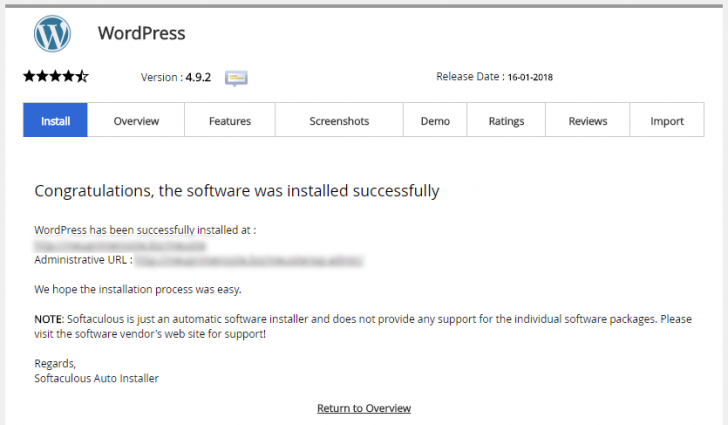
The installation typically takes a few seconds. After it’s finished, a confirmation screen appears showing the site URL and the WordPress admin panel URL.
chsyys/UnPlash
Clicking on the access URL to the panel will lead you directly inside without the need for login credentials due to integration with Softaculous and WordPress installation. Alternatively, if you access the dashboard using the displayed address, you will be required to enter the login details you created.
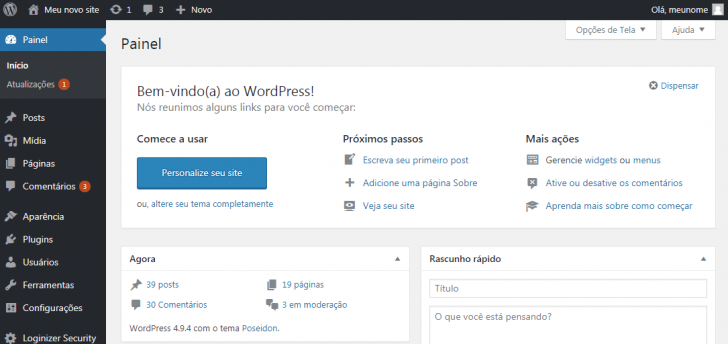
Upon accessing the dashboard, you will see a page similar to this.

If you have successfully completed these steps, you have effectively installed WordPress on HostGator. Your next task is to personalize your site and publish content.
If you’re willing to deal with some coding and settings, continue reading to learn how to manually install WordPress on HostGator.
Manual setup of WordPress on HostGator
The process of setting up WordPress is often referred to as the “famous 5-minute installation” due to its speed and simplicity. Once you have set up the environment and started the installation, it can be completed in less than 5 minutes. Give it a try and see for yourself! 🙂
Ingredients required
Prerequisites for setting up WordPress on HostGator are listed below.
- Hosting options include plans such as P, M, or Business, as well as VPS or dedicated servers.
- A MySQL database is already part of the plans mentioned above.
For handling and moving files:
- Accessing the hosting server is possible through FTP, SSH, or the Hosting File Manager.
- A source editor like Atom or Notepad++
If you have all the necessary components, you are ready to begin setting up your WordPress. Let’s get started. 🙂
Step 1 involves setting up the database.
WordPress uses a database to store content and configuration information, with MySQL being the original database but MariaDB also being compatible.
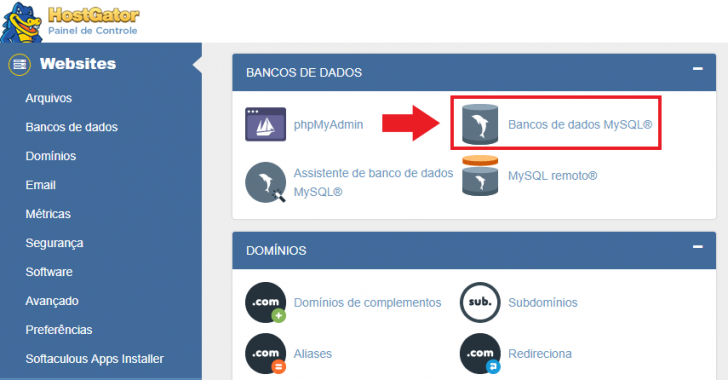
To set up the database, visit the HostGator cPanel and find the option “MySQL Databases” under the Databases category.
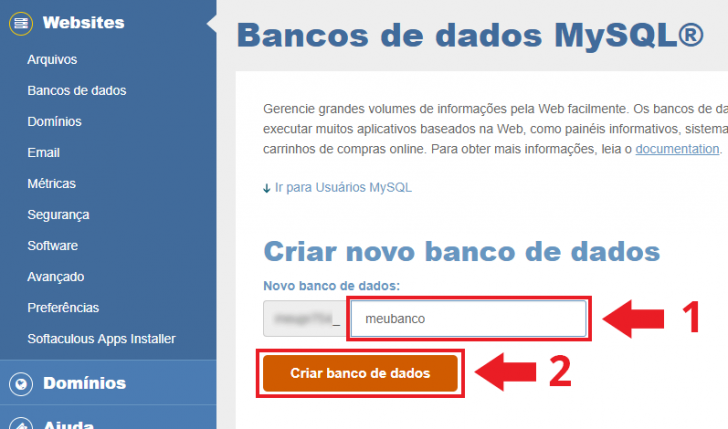
Provide the database name in the field that appears. Keep in mind that a predefined prefix is used to ensure the uniqueness of the database name. Once you have entered the desired name, select the “Create Database” option.
The bank establishment confirmation will be displayed next. Use the “return” arrow to go back to the database administration screen.
After setting up the bank, the next step is to establish a user account. To do so, navigate to the “Add new user” section, where you should enter the username in the designated field. The field contains a fixed prefix for consistency, as previously mentioned.
Set a robust password for the database by utilizing the password generator tool found on the page. Simply click on the “Password Manager” button to generate a password and save it securely.
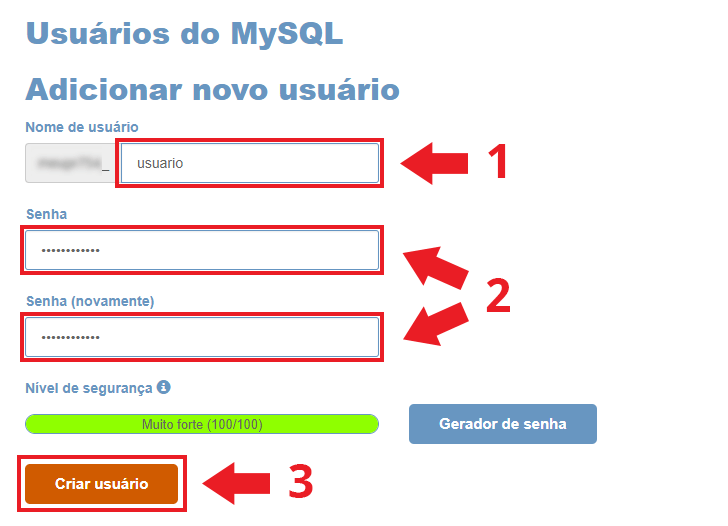
After filling out the fields, select the “Create User” button. A confirmation screen will appear. Click on the “return” link to go back to the database administration page.
It is important to connect the user with the database by selecting the database in the “Add user to the database” section and clicking the “Add” button.
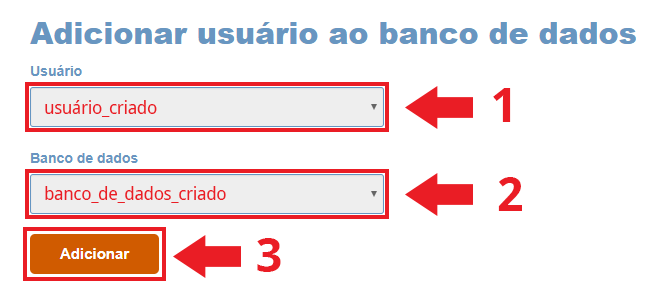
Inform what privileges this user will have in the database by selecting “All privileges” followed by clicking on “Make changes” on the subsequent screen.

This is the essential process for setting up the MySQL database. Make sure to keep a separate record of the database name, user, and password generated. This data will be required for the WordPress installation later on.
Download WordPress by following step 2.
The following action involves downloading the WordPress files, which can be found on the official CMS website at wordpress.org. Save the .zip file in a location that you can easily find later.
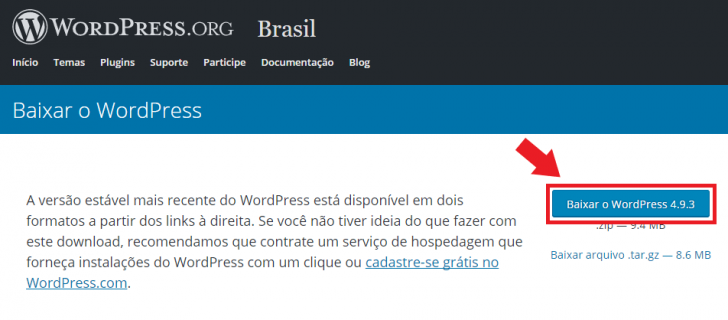
Extract the contents of the .zip file.
Edit the wp-config.php file in step 3.
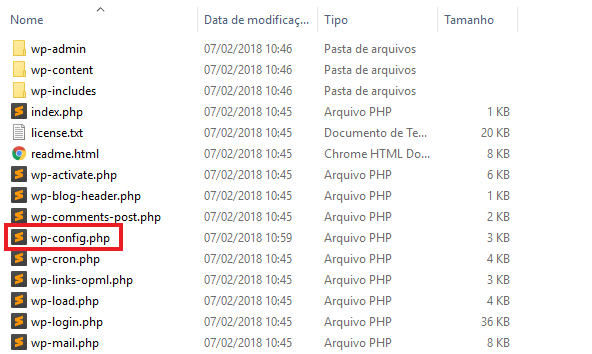
Access the folder where the extracted files are located and navigate to the directory named “wordpress.” Upon entering this folder, you will see the layout of WordPress files, resembling the image provided.
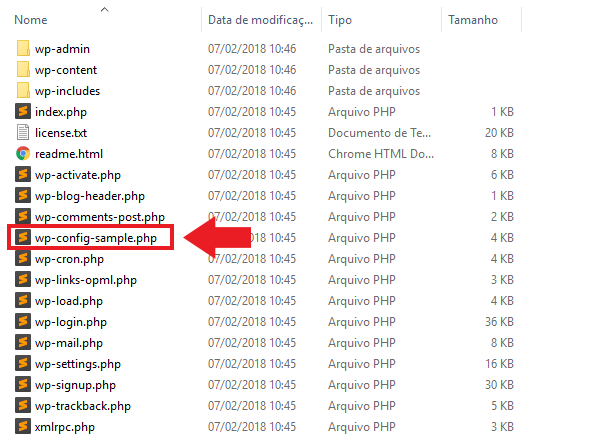
Locate the wp-config-sample.php file, open it using your preferred code editor, and save a copy of it as wp-config.php.
Edit the database connection details in the wp-config.php file using the same information you used to create the database, including the name, user, and password.
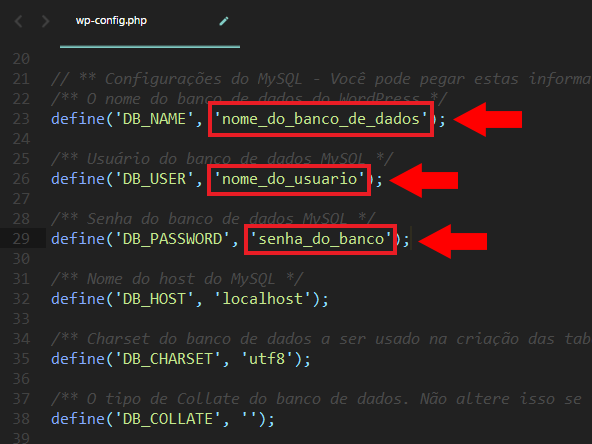
Edit only the parts within single quotes (‘), such as DB_HOST, DB_CHARSET, and DB_COLLATE, without altering them.
After making changes, save the document. You may remove the wp-config-sample.php file and retain only the wp-config.php, which includes the data you inputted.
chsyys/iStock
Step 4: Transfer files
The following step involves transferring the WordPress files to the server. Select your preferred approach and proceed with uploading all the files.
To install WordPress at the root of your domain, place the files in the public folder known as public_html for HostGator. For a subdirectory installation, place the files in a specific directory within the public folder (e.g., public_html/site). To install WordPress in a subdomain, first create the subdomain, transfer the files there, and then proceed with the installation.
After identifying the problem, proceed with file transfer using FTP. WordPress will be installed in a subdirectory such as /home/user123/public_html/mynewwebsite. Access the server using an FTP program, select the files on your computer and the destination folder on the server, and initiate the transfer.
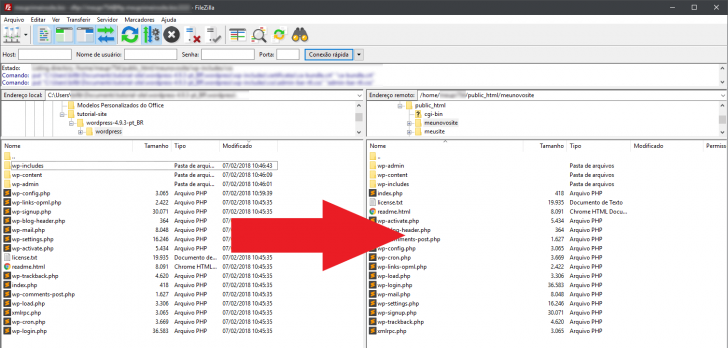
Wait for all files to be transferred. The duration of the process may vary based on your internet connection speed.
Step 5: Go to the installation link.
After finishing the file transfer, open the browser and visit the WordPress installation URL, which follows a specific pattern.
If you plan to set up WordPress in the main domain directory (public_html):
If you plan to set up WordPress in a subdirectory (within public_html/folder):
Replace “my site” with your domain and the folder with the name of the directory where you uploaded the files.
When you visit the installation URL, you will be prompted to provide essential details about your WordPress website.
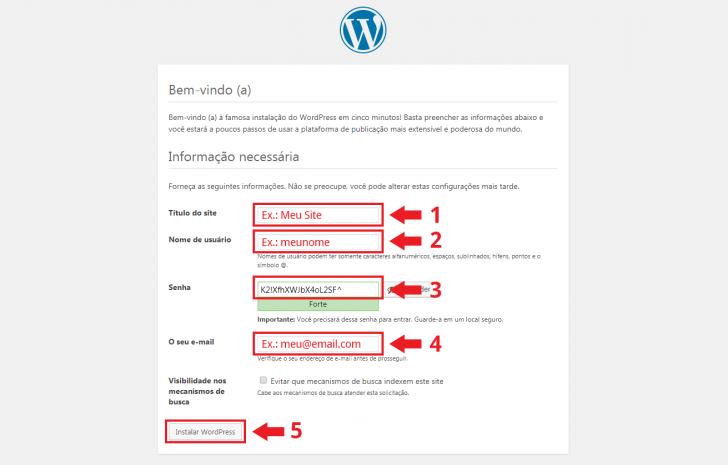
Fill in the required fields with your website details. It is advisable to utilize the password generator provided on the page to create a secure password. Remember to save your login credentials in a safe place as they will be necessary to access the WordPress dashboard later. Additionally, provide your email address for receiving important WordPress notifications and for password recovery purposes in the future.
If you don’t want your site to show up in search engine results, there is an option to select to hide it. Otherwise, leave it unchecked.
Click on “Install WordPress” after filling out all the fields. Clicking the WordPress button will generate the necessary tables in the database using the credentials provided in the wp-config.php file.
The setup takes a brief moment. Afterward, a confirmation screen will appear.
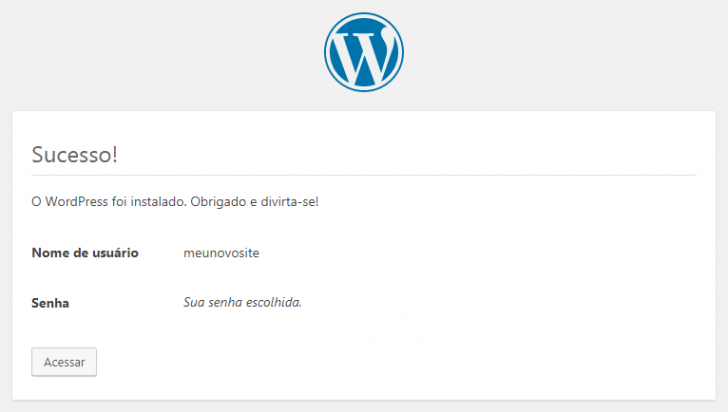
Click on the “Access” button to go to the login page. Enter the username and password you generated to log in to the WordPress admin area.
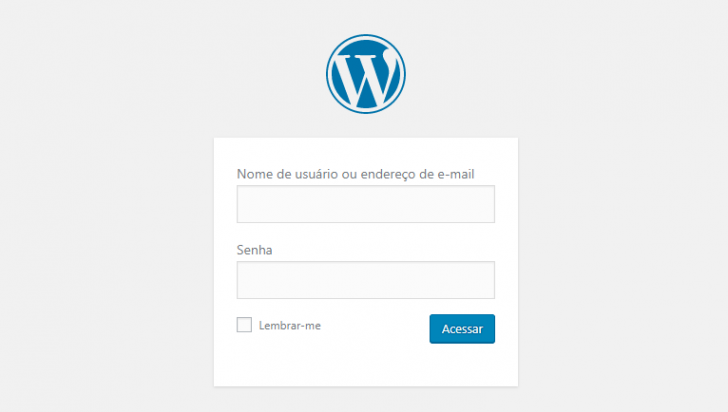
Submit your information to gain entry to the WordPress administrative dashboard.
chsyys/FreeImages
You can begin personalizing your WordPress website by adding themes, plugins, and content.
Explore more: Google Kit Site: discover everything about this WordPress plugin.
Conclusion
We discussed two methods for installing WordPress on HostGator in this article: one using Softaculous for automatic installation, and the other involving manual installation with the WordPress source code and an FTP program.
After setting up WordPress, it’s advisable to check out an article offering 7 tips for creating a professional WordPress website. Additionally, consider configuring other WordPress aspects like user-friendly URLs and obtaining an SSL certificate. Explore detailed instructions and informative posts for guidance.
If you need clarification or have additional information, feel free to comment, and we will be happy to assist you.
Published on 07/02/2018 and revised on 25/06/2020.
Tags associated with this content include Tutorials and WordPress.